

A flickering fixture two months after installation. A driver that buzzes louder than a fridge. A glass shade that decided to abandon ship at 2 a.m., spraying shards across the dining table. I’ve walked into too many homes where a beautiful modern flush mount chandelier turned into an expensive, dangerous headache because someone skipped the homework. The decorative cover can be stunning, but it’s what’s hidden beneath that ceiling canopy that keeps your family safe and your lights working.
The practical test I apply is to look at the light distribution, not the decorative cover: a good modern flush mount chandelier bounces light off the ceiling to make a small room feel bigger, while a cheap one just points the LEDs down. I also check how the LED boards are mounted—if they’re not on a heatsink or foil tape, the driver will overheat within a year and start flickering. The difference between a fixture that looks high-end and one that performs high-end often comes down to how heat is managed inside that shallow housing, a detail most spec sheets conveniently leave out.
That experience is exactly what we’re digging into today. Whether you’re refreshing a low-ceilinged hallway, adding drama to a compact dining nook, or solving a wiring puzzle in a 1950s condo, understanding the anatomy of these fixtures is the only way to avoid disaster. We recently broke down the iconic lines of a mid modern chandelier, and the same principle applies here: the right light transforms a room, but only if the hardware is sound. This guide won’t sell you a single fixture. It will, however, teach you to read between the lines of product listings, spot wiring red flags, and make decisions that leave your junction box—and your peace of mind—intact.
Key Takeaways
- A quality flush mount chandelier uses uplight to diffuse brightness, making a room feel larger rather than just casting harsh downward shadows.
- The fixture’s integrated LED driver must match your dimmer type—forward-phase or reverse-phase—or flickering is virtually guaranteed within months.
- Flush mount installations can fail catastrophically if the junction box isn’t rated for the fixture’s weight, even when the canopy looks sturdy.
- Modern design in these chandeliers is defined by clean geometry and layered acrylic diffusers, not ornate arms, and proper heat dissipation is what keeps those LEDs from burning out early.
How to Spot a Safe and Bright Modern Flush Mount Chandelier
The first thing most people notice is the frame—brushed brass, matte black, maybe some faceted acrylic. I notice the mounting bracket first. The second I see a strap held by two tiny machine screws into a plastic pancake box, I know we have a problem. A real chandelier-style flush mount has a ceiling-mounted canopy that expands the footprint of the junction box, distributing weight across a wider span. The canopy itself should be steel or thick cast aluminum, not stamped tin that bends when you tighten the screws. Tapping the metal with a fingernail tells you a lot; a dull thud means dense material, while a tinny ring usually means flimsy.
Light output is the other side of the coin. Manufacturers love to plaster “2400 lumens” on the box, but lumens are only half the story. I set a fixture on a test bench and look at the ceiling-spill ratio. Point the light at a white ceiling four feet above—if the glow spreads wide and soft, the diffuser and reflector geometry are doing their job. That’s the hall-of-mirrors effect that makes an eight-foot ceiling feel taller. If the LEDs just blast straight down through a thin acrylic panel, you get glare and harsh shadows. For a fixture to truly function as a modern flush mount chandelier, it needs that upward wash. Even a quarter-inch gap between the shade and the ceiling can create the ring of light that defines the entire room’s ambiance.
The Number One Killer of Integrated LEDs: Heat
Here’s what I wish more homeowners understood. An LED itself lasts 50,000 hours, but the driver—the little electronic brain that converts AC to DC—is not immortal. In a flush mount, the driver sits inside a sealed canopy with almost no ventilation. If the metal backing plate of the LED module is merely glued to a plastic housing with no thermal tape, the heat has nowhere to go. The driver’s electrolytic capacitors start cooking at about 85°C. They’ll bulge, leak, and eventually fail. That’s the flickering you start seeing around month ten.
When I’m evaluating a fixture, I look for a visible aluminum heatsink on the LED board. Even a thin finned ring can pull enough heat away to double the driver’s lifespan. Some high-end units from Modern Forms and Hudson Valley Lighting actually vent the canopy with tiny louvers—barely visible from the floor but crucial for convection. The ENERGY STAR program has documented how thermal management directly affects LED longevity, and I’ve seen that play out on ladders a hundred times.
Understanding Fixture Dimensions, Ceiling Height, and Room Placement
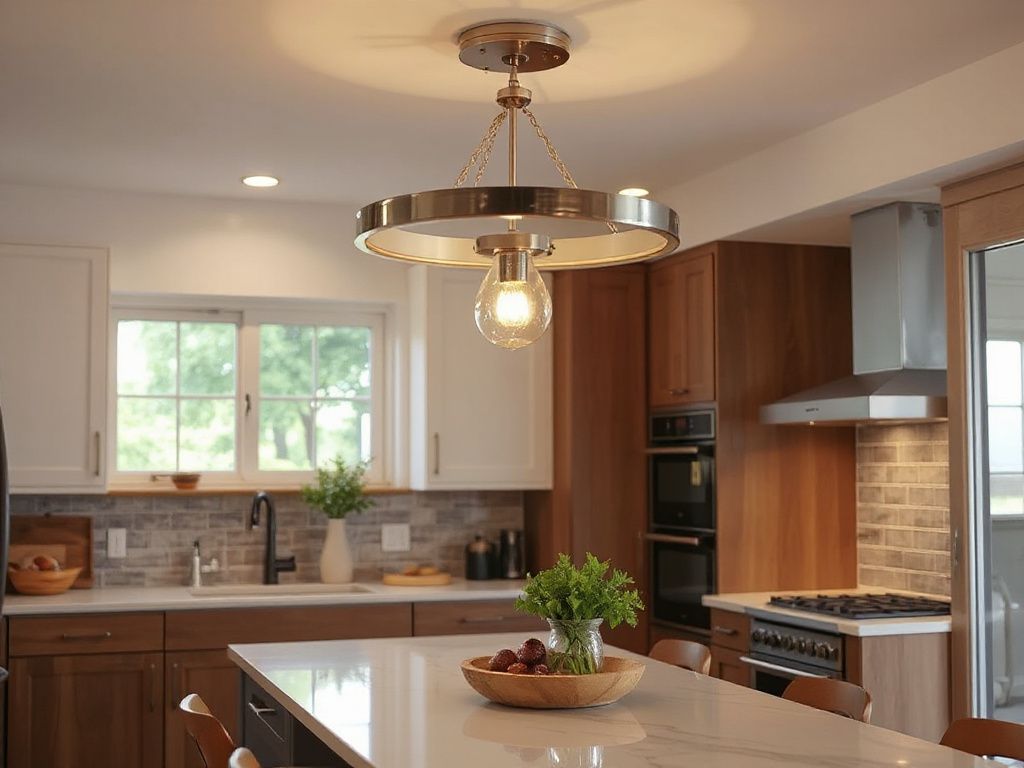
I can’t count how many times someone has handed me a box with a stunning 24-inch diameter chandelier flush mount, and I’ve looked up at a hallway barely 36 inches wide. Proportion matters. A flush mount sits directly against the ceiling, so its width sets the visual weight. For hallways, something in the 10-14 inch range often works. For an eight-person dining table, a fixture that’s 20-24 inches wide anchors the space without overwhelming it. Remember, with a flush mount, you’re not dealing with a hanging chain—you’re placing a disc of light on the ceiling. Too small and it looks like a misplaced spotlight. Too large and it presses down on the room.
The minimum clearance from the floor for any hanging chandelier is usually 7 feet, and that’s exactly why flush mounts exist for rooms with ceilings below 8 feet. A modern flush mount chandelier solves that spatial constraint by sitting only 3-5 inches off the ceiling. However, those few inches still matter. If you have a ceiling fan nearby, or a doorway that swings upward, measure the blade clearance. I once saw a gorgeous 5-inch-tall flush mount catch the top of an inward-opening pantry door. The glass didn’t break, but the ceiling bracket sure did.
Sloped Ceilings and the Question of Compatibility
Many people ask if you can install a modern flush mount chandelier on a sloped or vaulted ceiling. The answer is nuanced. True flush mounts (those with no downrod) generally need a flat ceiling. The canopy must sit flush, which means a slope leaves a visible gap and exposes wiring. There are a few fixtures with a ball-and-socket type canopy designed for slight angles, but they are rare. For a vaulted ceiling, you’re often better off with a semi-flush mount or a pendant that uses a swivel adapter. If you do find a flush mount rated for a slope, confirm in the manual that the slope kit allows the canopy to close fully against the ceiling; otherwise, the strain on the wiring connections becomes a serious fire concern.
For those bridging the gap between styles, a seeded glass flush mount light offers a texture that softens the sharp lines of modern design, but you still need to inspect the internal heat management just as rigorously. The glass itself can trap heat within the shade, accelerating driver wear if the fixture isn’t designed with a venting path.
Why the Driver and Dimmer Must Speak the Same Language
Flicker. Buzz. Flash-and-die. I trace ninety percent of these complaints back to a dimmer mismatch. Modern integrated LED flush mount chandeliers use drivers that demand a specific type of dimming: forward-phase (also called TRIAC or leading-edge) or reverse-phase (ELV or trailing-edge). The packaging should state this explicitly. It often doesn’t. I then spend twenty minutes on the manufacturer’s website looking at an obscure PDF with the driver model number, cross-referencing it against a Lutron compatibility chart.
Forward-phase dimmers were built for old incandescent loads and chop the AC wave at the front. Reverse-phase dimmers clip at the back and are much smoother for electronic LED drivers. If you connect a reverse-phase driver to a cheap forward-phase dimmer, you’ll get a pronounced buzz and flicker around 30 percent brightness. That buzz is the driver’s capacitors being hammered by a voltage they weren’t designed to handle. Over time, the stress kills them. For smart home dimmers, the same rule applies—many WiFi dimmers default to forward-phase. Check the app settings. Lutron Caséta, for instance, allows phase selection, but some budget smart dimmers do not. Always verify before you finish tucking the wires into the box.
Color Temperature and CRI: The Numbers Behind the Light
A modern flush mount chandelier often uses integrated LEDs, meaning you can’t just swap a bulb. So choosing the color temperature before you buy is permanent. 2700K gives you that warm, incandescent-like glow—perfect for living rooms plastered with warm woods and brushed brass. 3000K is slightly cleaner, better for kitchens where you want to see the true colors of food. 3500K and above starts feeling clinical; I only recommend that for bathrooms or laundry rooms. The best fixtures now offer selectable CCT via a small switch inside the canopy, letting you toggle between 2700K, 3000K, and 3500K. That switch is a lifesaver, but make sure it’s accessible after mounting without pulling the whole fixture down.
CRI—Color Rendering Index—gets overlooked because you can’t see it on a showroom model. A CRI of 90+ means the light spectrum fills in reds and deep blues, making skin tones look healthy and not gray. The difference between an 80 CRI and 90 CRI fixture is stark if you’ve ever tried to distinguish a navy sock from a black sock under a cheap LED. Look for the CRI number in the specifications. If a manufacturer won’t publish it, assume it’s 80. I’d hold out for 90, especially in dining areas and bathrooms. The Department of Energy notes that high-CRI LEDs significantly improve visual comfort and color accuracy, and I can attest from installations that a 90 CRI flush mount makes a room feel richer, even at lower lumens.
What ‘Modern’ Actually Means in a Flush Mount Chandelier
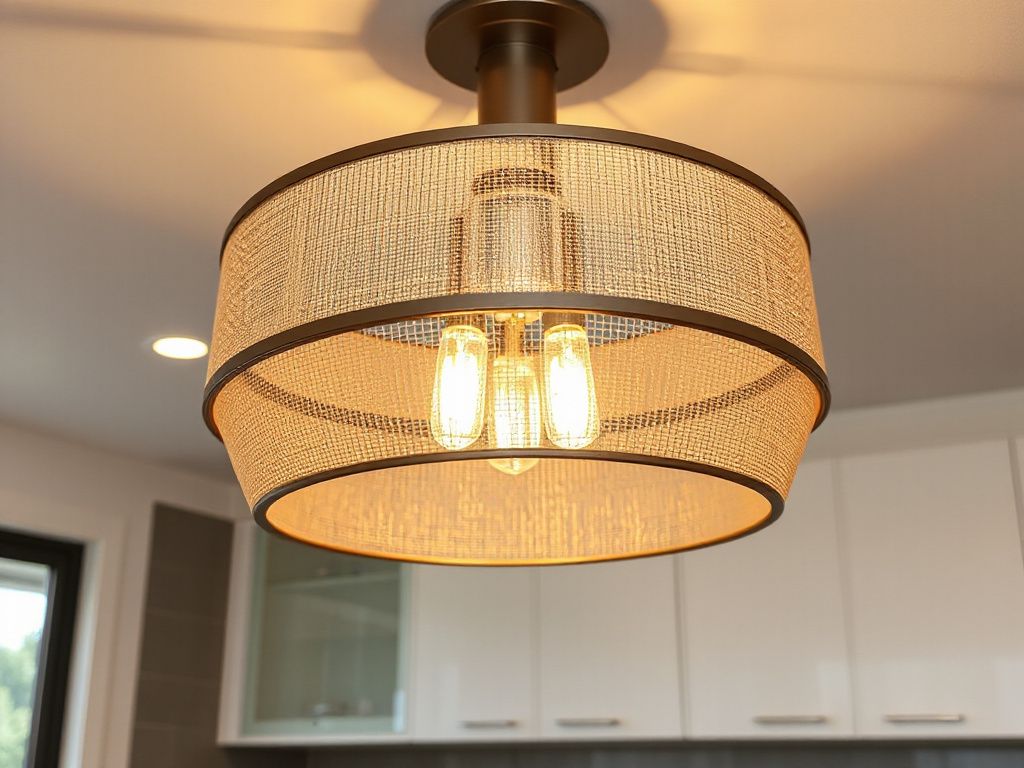
Not everything called modern is modern. I see listings slapping that word on any fixture with a brushed nickel finish. That’s not it. True modern design in these chandeliers is about geometry and material honesty. Think clean circles, offset rectangles, thin metal bands holding a fiberglass diffuser that glows evenly edge to edge. The silhouette reads as a minimalist sculpture, not a bunch of dangling crystals. The arm structures of a classic chandelier disappear entirely. In their place, you get layered discs of faceted acrylic that refract LED light into scattered patterns without adding physical bulk.
The finish matters, but it’s subordinate to form. Brushed brass is a signature of the look, but it must be a warm, muted brass—not that shiny gold that screams 1990s builder-grade. Matte black is the other dominant player, often paired with a white diffuser to create contrast. A modern flush mount chandelier made by a company like Schonbek will use precise laser-cut metal and hand-polished edges that you can feel with a fingertip, while the knockoff version has sharp burrs and a sloppy fit between the diffuser and the canopy. That slop lets dust inside and, more critically, can rattle when the door closes or the upstairs AC kicks on.
There’s also a rising trend of integrating these fixtures with smart lighting control platforms. When the wiring is solid and the dimmer is matched, a modern flush mount chandelier can be phase-dimmed through a system like Caséta or Zigbee hubs, responding to “goodnight” routines. However, the fixture itself rarely contains a smart receiver; the intelligence lives at the switch. So you’re not locked into a proprietary ecosystem—a benefit if you ever need to swap a driver or hand a new owner a standard switchplate.
The Difference Between a Chandelier and a Chandelier-Style Flush Mount
This trips up a lot of buyers. A true chandelier has arms, bobeches, and individual bulbs that hang below the canopy. A chandelier-style flush mount is a compact LED fixture with layers and diffusers that capture the ornate, layered look of a chandelier without the vertical drop. It uses a shallow canopy, often with cutouts or a drum shade that mimics the silhouette of a tiered chandelier. But there are no hanging arms. The light source is a flat PCB with a diffuser, and the visual complexity comes from overlapping metal rings or faceted crystals set flush against the ceiling. Understanding this distinction saves you from buying something that claims to be a chandelier but is actually a ceiling light with a faceted cover. And the weight difference matters—the latter can often be supported by a standard box, while a genuine chandelier even in flush form may need additional bracing.
If you’re exploring how compact LEDs have evolved in other light forms, our breakdown of flush mount LED pods covers the tech that’s been miniaturized into these decorative fixtures. The driver miniaturization you see in pod lights is the same tech now powering those elegant flush chandeliers, which explains both the benefits and the heat challenges.
Installation, Maintenance, and the Repairs Nobody Talks About
Hanging a modern flush mount chandelier should be a straightforward swap—two wires, a ground, and a mounting bracket. Except when the ceiling box is buried under four layers of texture. Or the canopy’s screw holes don’t align with the bracket because the bracket is bent. I always test-fit the canopy to the bracket on the ground before I lift the fixture. If it doesn’t seat flush without force, I’ll loosen the screws and reseat the bracket. Forcing it not only scratches the ceiling paint but bends the canopy rim, leaving a permanent gap you’ll see every time you walk under it.
Cleaning those glass or acrylic shades is another part of ownership nobody plans for. Dust builds up inside the diffuser cavity even on fixtures that seem sealed. Once every six months, I cut power at the breaker, remove the shade screws (usually tiny set screws around the perimeter), and wipe the inside of the diffuser with a microfiber cloth. Don’t use glass cleaner on acrylic—it can cause micro-cracking over time, especially on faceted surfaces. Warm water and a drop of dish soap do the job better. For fiberglass diffusers, a dry microfiber only; water can wick into the edges and discolor the material.
As for LED module replacement, it’s not the plug-and-play simplicity of an A19 bulb. Most integrated LED flush mounts have a proprietary module that clips or screws into the housing. When the module fails—often the diodes themselves, less often the driver—you contact the manufacturer for a replacement part. There’s a two-to-three year parts warranty standard for reputable brands. I keep a record of the driver model number and the purchase date inside the canopy on a sticker, so a future service call doesn’t require tearing the fixture apart to identify it. The maintenance cost over time is lower than standard ceiling lights because you’re not buying bulbs, but when the LED module goes, you’re paying for the part plus an electrician’s hour if you’re not comfortable with the swap.
Converting a Regular Flush Mount Without Rewiring
Sometimes a homeowner wants to convert a basic flush mount to something more decorative without pulling new cable. The good news is that if the existing box is securely mounted and the wiring is in good shape, you can simply replace the fixture. A chandelier-style flush mount uses the same 120V connection. No special wiring. But—and this is where I see people get into trouble—you cannot hang a heavier decorative assembly from a box that was originally only supporting a thin glass globe. The box itself must be metal, firmly attached to a ceiling joist or with an old-work brace span. I’ll drill out the old plastic box and install a new steel pan box rated for 50 pounds if there’s even a question. That’s an extra forty minutes of work but it prevents the fixture from pulling out of the drywall.
The canopy itself hides the wiring, which is why heat buildup becomes an issue: all that driver and LED board heat gets trapped in a space sometimes packed with insulation. If the manual specifies that the canopy should not be covered in insulation (a common note for IC-rated housings), follow that. I’ll create a small air pocket by installing a draft stop around the box before I push the insulation back. Without that, the driver cooks, and you’ll be back on a ladder in eighteen months.
Frequently Asked Questions
How close to the ceiling does a modern flush mount chandelier actually sit?
The typical height is between 3 to 6 inches. The shallowest models, often called “hugger” designs, sit just 2.5 inches from the ceiling, while those with layered diffusers might extend 8 inches. Always check the spec sheet’s “height” measurement—not the canopy height—to ensure it clears your door swings and any nearby crown molding.
Can I install a modern flush mount chandelier on a vaulted ceiling?
Most standard flush mounts require a flat, horizontal ceiling. A slope creates an uneven gap that exposes wiring and strains the mounting points. A few manufacturers offer a sloped-ceiling adaptor kit, but these are specific to that model. If your ceiling has a steep pitch, consider a semi-flush mount with a swivel canopy instead. Always confirm UL listing for the slope angle before purchasing.
What causes flickering in a dimmable integrated LED flush mount, even with a new bulb?
The integrated LED’s driver and your wall dimmer are likely mismatched. Forward-phase dimmers (TRIAC) often cause LED drivers to flicker at low settings. Swap in a reverse-phase (ELV) dimmer specified by the fixture’s manufacturer. Also check if the fixture is on the same circuit as a motor load like a ceiling fan; voltage fluctuations can mimic dimmer flicker.
How can I tell if a flush mount chandelier canopy is properly vented for heat?
Run the fixture at full brightness for an hour, then feel the canopy. Warm is fine; hot to the touch (above 60°C, or too hot to hold for five seconds) means poor ventilation. Look under the canopy for louvers or a gap between the ceiling and the canopy rim that allows convection. A sealed canopy without a metal heatsink is a design flaw that shortens driver life.
