

According to the National Fire Protection Association, lighting equipment is responsible for an estimated 9,000 home fires annually, with many of those incidents traced directly to improperly installed ceiling fixtures. That striking number might feel worlds apart from the elegant atomic sputnik or sculptural globe hanging in a dining room, but the gap between design and danger closes fast when a mid modern chandelier is treated as just a decorative object. I’ve spent years as a lighting specialist and certified electrician, and I can tell you that even the most stunning mid-century inspired fixture hides a story of wires, brackets, and junction boxes that demands respect.
A mid modern chandelier isn’t just a throwback to the clean lines of the 1950s and 60s; it’s a centerpiece that blends form with the functional reality of household current. The term itself covers a broad family of designs—spoked starbursts, tiered drum shades, cascading glass globes—all rooted in the optimism of post-war design. Getting one into your home the right way means understanding not just where it should hang, but what’s happening inside the canopy and behind the switch plate.
Key Takeaways
- Even a perfectly manufactured mid modern chandelier can become a fire risk if installed on an old junction box that can’t support more than 50 pounds or lacks a UL-rated brace.
- Three-wire systems (hot, neutral, ground) are non-negotiable; fixtures with only two wires or a loose ground strand should be flagged before they touch your ceiling.
- Instructions that don’t match the hardware inside the box are a warning sign—stop and verify wire gauge, bracket dimensions, and mounting hole alignment against the manufacturer’s diagram.
Understanding the Mid-Century Modern Chandelier Aesthetic
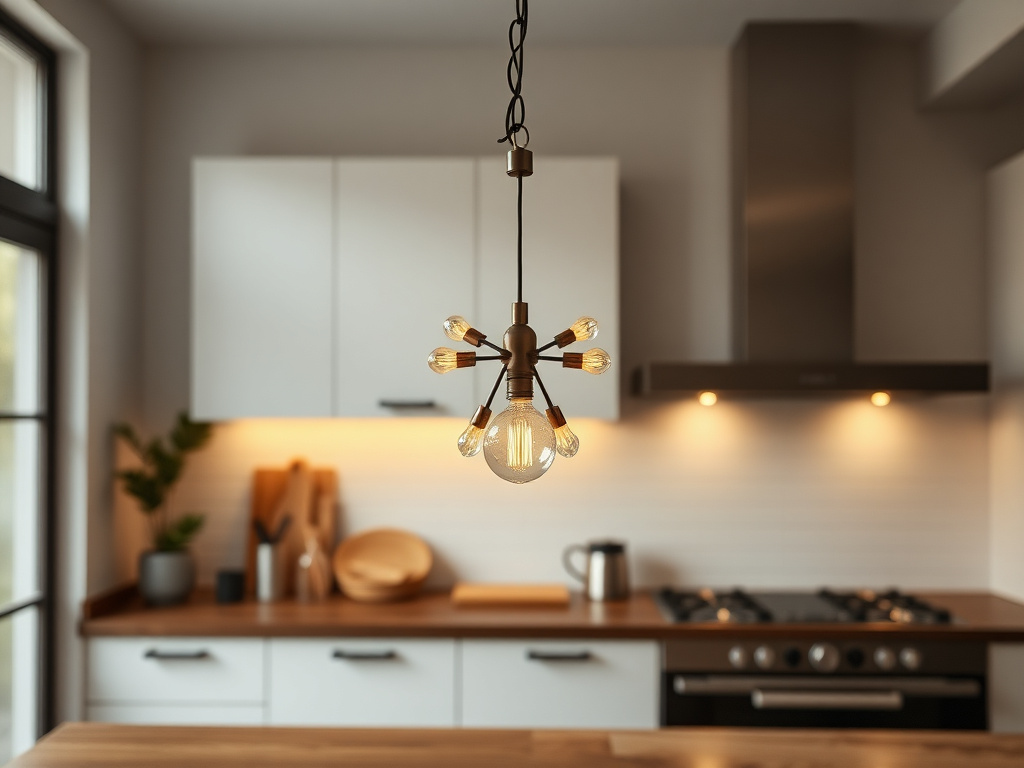
The phrase “mid modern chandelier” can conjure up everything from a brass geometric ring to an asymmetric mobile of opaline glass. While the visual vocabulary is diverse, the common thread is a commitment to simplicity, organic curves, and a sense of airiness that feels just as fresh in 2026 as it did when designers like George Nelson pioneered the look. These fixtures draw from the optimism of the atomic age and the Bauhaus principle of marrying art with industry.
In homes today, a mid modern chandelier often anchors an open-plan living space or floats above a dining table, its arms stretching out like a kinetic sculpture that happens to hold light bulbs. The materials range from walnut and teak to spun aluminum and brushed brass. That material choice isn’t just aesthetic; it directly affects weight, heat dissipation, and how the fixture interacts with your home’s electrical load. I’ve seen beautiful fixtures with solid brass arms that weighed in at 45 pounds—a full test of a standard ceiling box’s integrity.
The Anatomy of a Chandelier: What an Electrician Sees
When a homeowner sees a sleek cluster of glass shades, I see wire splices, strain reliefs, and the UL label. A properly listed fixture will carry a label from a nationally recognized testing laboratory. It also will have a clear sticker or stamp indicating maximum bulb wattage—typically 60 watts per socket for candelabra-base lamps, though LED equivalents make this less critical as long as the fixture isn’t crammed with heat-trapping fabric shades.
The internal wiring of a mid modern chandelier should be 18-gauge or larger for most circuits. I often find import fixtures where the wire insulation looks thick but the copper inside is startlingly thin. That means higher resistance and more heat, especially if someone installs halogen bulbs. A quick twist of a wire nut onto a strand that’s barely 20 gauge can loosen over time, arcing inside the junction box and generating temperatures well over 1,500°F in a split second.
Sockets and Lampholders
The heartbeat of any chandelier is its sockets. Look for ceramic or heavy-duty phenolic sockets with a brass screw shell. Cheaper aluminum shells can oxidize and create a loose connection, leading to flickering or dead bulbs. Many mid-century reproductions use E12 (candelabra) bases, but I’ve opened boxes to find sockets that were misaligned, forcing users to bend bulb pins. That’s a tangled web of potential shorts waiting to happen.
In an amber chandelier style, the warm resin or tinted glass drops often hide tiny socket covers that reflect heat upward. Always confirm that the socket design allows some ventilation; trapped heat can degrade the insulation paper inside the socket shell. Bulb changes become a simple checkup—if your bulb feels hot to the touch after a few minutes, the socket might not be rated for that wattage or the shade is too snug.
Canopy and Strain Relief
The canopy is the decorative plate that covers the hole in the ceiling, and it performs a critical safety function: it houses the wire splices and prevents them from bearing the full weight of the fixture. A mid modern chandelier often comes with a low-profile canopy that can’t accommodate a bulky wire connector tangle. I’ve spent many service calls simply replacing orange wire nuts too large for a shallow canopy with slimmer, approved push-in connectors. That prevents the canopy from being forced down by a lump of wiring, which can crack it or push the bracket screws out of alignment.
Safety Inspection Checklist Before You Install
Years of crawling into attics and unscrewing thousands of canopies have taught me that 10 minutes of inspection spares months of worry. Here’s the exact checklist I run through before I even open the circuit breaker:
- Weigh the assembled fixture: Use a digital luggage scale. If it’s over 50 pounds, the junction box must be fan-rated or have a listed brace spanning ceiling joists.
- Inspect all wire insulation: Look for nicks, thin spots, or discoloration along the full length, especially where wires enter the metal stem.
- Verify the ground wire: The green or bare copper conductor should be continuous from the fixture body to the splice point. No grounding means no fault path.
- Check screw torque: All mounting screws, arm connections, and set screws should be snug but not stripped. A wobbly arm can saw through its own wire over time.
- Confirm the mounting bracket matches the box spacing: Some mid modern chandeliers come with a Euro-style bar that doesn’t align with standard 4-inch octagonal boxes without an adapter.
Common Wiring Red Flags
Old houses and mid-century style go together beautifully, but the wiring inside a 1950s ceiling may not have aged as gracefully as the design. Knob-and-tube wiring, aluminum branch circuits, and missing grounds are all potential hazards. If you encounter aluminum wiring (silver-colored, not tinned copper), never splice it directly to a chandelier’s copper leads without a COPALUM or AlumiConn connector rated for that purpose. Standard wire nuts and electrical tape won’t prevent the galvanic corrosion that leads to overheating.
Another red flag is a single hot wire coming into the box, often found on switch loops in older homes. A mid modern chandelier with a metal body must have a reliable ground path. If the box itself isn’t grounded, I run a separate ground wire back to the panel—not a project for a casual DIYer. As an electrician, I carry a plug-in receptacle tester and a non-contact voltage pen on every call, but for a hardwired fixture, a multimeter set to continuity mode is the true truth-teller.
Installation Step by Step (With Safety Focus)
The following sequence assumes a standard ceiling box rated for the fixture weight, a functional hot-neutral-ground circuit, and a mid modern chandelier where the instructions actually reflect reality. These steps are based on the National Electrical Code (NEC) 2023 cycle, which remains the baseline for most jurisdictions in 2026.
Step 1: Shut Off Power and Confirm
Turn off the breaker, then use a non-contact voltage tester on the wires inside the box. I’ve had breakers mislabeled more times than I can count. Tag the breaker so no one flips it while you’re on a ladder. The tester should indicate no voltage on any wire, regardless of switch position.
Step 2: Mount the Bracket and Test Weight Support
Secure the fixture’s mounting strap to the box using 8-32 machine screws at a minimum—these are the standard bolts that thread into the metal ears of the box. If the box lacks threaded holes, it wasn’t designed for a light fixture and must be replaced. Give the bracket a firm downward pull; it should not flex or pop the box away from the ceiling.
Step 3: Pre-wire and Hang
Connect the fixture’s ground wire to the box grounding screw first, then pigtail to the supply ground. Splice neutral to neutral (white to white) and hot to hot (black to black) with approved connectors, twisting wires clockwise before capping. Never rely on the fixture chain or stem for grounding, even if it’s all metal—a loose swivel joint can break the path.
With a ring chandelier design, the circular frame can be awkward to manage solo. I always use a helper or a temporary hook to hang the ring while making connections, so no weight rests on the wires. A ring that’s twisted during tightening can put torque on the splices, pulling them apart inside the cap.
Step 4: Secure the Canopy Without Pinching
Tuck wires carefully so they lie flat against the box, and tighten the canopy nut until the plate sits flush. A bead of clear silicone around the edge can prevent vibration noise but isn’t a structural shortcut. If the canopy still wobbles, examine the bracket for stripped threads—a common problem with soft imported hardware.
Mounting Hardware: What To Look For
The hardware bag that comes with a mid modern chandelier often tells you more about the quality than the glass shades do. I expect to see stainless steel or zinc-plated screws, a thick strap at least 1/8 inch steel, and lock washers to prevent loosening. If the bag contains brittle-looking plastic anchors meant to hold the fixture to the ceiling without a box, throw them away immediately. Legitimate fixtures rely on the junction box, never on drywall plugs.
A pattern I see with some reproduction fixtures involves a universal mounting plate with a dozen slots, only two of which align with standard box holes. The result is a plate that puts twisting forces on the screws. I keep a universal 15-inch crossbar in my kit for exactly these situations, allowing me to drill new mounting holes that match the box while distributing weight evenly.
Dealing with Inconsistent Instructions
Few things irritate me more than opening a beautiful mid modern chandelier and finding a single photocopied page with exploded diagrams that don’t match the parts in the box. This isn’t just a nuisance; it can lead to wrong assembly that jeopardizes the fixture’s structural integrity. When the instructions show a stem length that’s off by 2 inches, the wires end up stretched or the canopy sits at an angle.
My protocol when a mismatch occurs: lay out every component on a towel and take a photo with your phone. Compare the number of spacers, rubber grommets, and threaded nipples to the parts list. Call the manufacturer’s technical support right away if something is missing. I’ve cobbled together a fix once with a longer threaded pipe from the hardware store, but it required tapping new threads and wasn’t UL compliant. That’s a path I warn against.
Design Integration and Room Positioning
Beyond the electrical backbone, a mid modern chandelier’s scale and placement affect both ambiance and safety. A fixture that hangs too low over a dining table—below 30 inches from the tabletop—not only obstructs conversation but also risks a direct bump that stresses the canopy. I recommend 32 to 36 inches above the table for most 8-foot ceilings. In a living room with a high ceiling, a chandelier’s bottom should be at least 7 feet from the floor to avoid head injuries.
Natural light and window treatments also influence how a chandelier performs. A jewelry chandelier style with faceted crystal drops will scatter sunlight dramatically through sheer drapes, but the same crystal can create hot spots when the sun hits it directly, potentially overheating nearby lamp sockets. Use dimmable LED bulbs with a warm color temperature (2700K–3000K) to keep the glow authentic without pushing the thermal limits.
Surroundings and Heat Management
Many mid-century chandeliers use baked enamel or painted metal shades. If these are placed within 12 inches of insulation or wood framing, building code often demands a non-combustible barrier. In sloped cathedral ceilings, the top arms of a starburst fixture may sit dangerously close to the roof deck. I use a laser thermometer on the hottest shade after an hour of operation: anything above 90°F on the surface is a sign that airflow is insufficient and the bulb needs to be downgraded to LED.
Maintaining Your Mid Modern Chandelier
Maintenance isn’t just about dusting. Every 6 months, I tighten the mounting screws and inspect the wire splices. Vibration from people walking on the floor above can loosen wire nuts microscopically, eventually creating a resistive connection. A fuzzy crackle sound when you tap the fixture is often the earliest clue.
When changing bulbs, wipe the socket threads with a dry microfiber cloth. I also treat brass arms with a pH-neutral cleaner to prevent corrosion that can break down the plating and expose reactive base metals. Avoid spray polishes near the sockets—overspray can get inside and coat the contact tabs, leading to intermittent flickering.
If you ever notice a faint buzzing, don’t dismiss it. Buzz arises from laminations in the fixture’s transformer (if low-voltage) or from a dimmer incompatible with LED bulbs. I test with an old-fashioned incandescent bulb momentarily: if the buzz stops, the dimmer and LED combination is the culprit. Replace with a trailing-edge dimmer rated for 10 watts minimum to silence the noise.
Understanding Transformers in Low-Voltage Mid Modern Chandeliers
Some mid modern chandeliers, particularly those with tiny halogen capsules or integrated LED arrays, operate on 12 volts and include a transformer hidden in the canopy or in-line. These transformers generate heat and need air circulation. Stuffing the canopy with insulation or cramming a heavy chandelier chain tight against the ceiling can trap heat, pushing the transformer past its 105°C thermal cutoff. That’s when the lights go off mysteriously and come back after a rest, leading homeowners to blame a ghost. The fix is simple: allow a 0.5-inch air gap around the canopy and never wrap the wiring with electrical tape inside the box.
A ring chandelier with a built-in LED driver may hum at a frequency that drives people nuts. Replacing that driver requires exact voltage and current specifications—typically 700mA constant current or 24V constant voltage. Guessing here can fry the LEDs instantly. I always take a photo of the driver’s label before even unscrewing a single wire.
When Vintage Meets Modern: Rewiring Older Fixtures
Many enthusiasts hunt down original mid-century chandeliers at estate sales. I applaud the sustainability, but the wiring inside a 60-year-old piece is almost always dried out, brittle, and lacking a ground. Rewiring a vintage fixture requires disassembling each arm, feeding new 18 AWG, 600V-rated wire through narrow tubes, and ensuring the new sockets are securely riveted or screwed in place. A strand that rubs against a sharp metal edge inside an arm will chafe quickly. I use Teflon sleeving at every entry point to protect the insulation.
Vintage sockets were often rated for 75 watts with a paper liner that’s now crispy. Replace them with modern phenolic equivalents that carry a UL mark. This is also the moment to add a ground wire, even if the original didn’t have one, by connecting it to the metal body of the chandelier near the center hub. Grounding an antique fixture that hangs over a dining table gives peace of mind when little hands might touch it.
Integrating Smart Controls Without Sacrificing Safety
Smart bulbs and wireless switches have become mainstream by 2026, and they can absolutely work with a mid modern chandelier. However, the in-line dimmers or smart modules must not be crammed into the junction box if they exceed the box’s fill capacity. The NEC specifies that each #14 wire counts as 2 cubic inches; a typical 4-inch octagonal box maxes out at 15.5 cubic inches. Adding a bulky smart relay can push the box past its limit, creating a heat trap. I mount smart modules in a separate accessible box in the attic when possible.
Also, select smart bulbs whose shape mimics original globe or torpedo lamps, but verify they’re rated for enclosed fixtures if your shades are sealed. An enclosed LED bulb that overheats can cycle on and off abruptly—a sudden dark room is more than an inconvenience when you’re holding a plate of hot food.
Frequently Asked Questions
What defines a mid modern chandelier?
A mid modern chandelier captures the design language of the mid-20th century, featuring clean lines, organic forms, and materials like brass, teak, and opal glass. These fixtures often use geometric arrangements—spokes, rings, or tiered globes—without heavy ornamentation. In electrical terms, they tend to use candelabra sockets and require careful weight support due to their sometimes expansive arms. A true quality piece will have a stamped UL label and clearly marked wattage limits.
How do I safely install a mid modern chandelier on a sloped ceiling?
Sloped ceilings demand an angled canopy adapter and, just as critically, a junction box rated for the angle. Many fan-rated boxes come with a sloped ceiling kit that tilts the box itself, keeping the fixture plumb. Without this, the chandelier hangs at an angle, stressing one side of the mounting screws. Always check that the adapter’s ball joint allows full swivel without binding, and use a spirit level before final tightening. The wire connections inside the box remain standard, but the canopy must sit flush against the adapter, not the ceiling.
Are vintage mid modern chandeliers safe to rewire?
Yes, vintage fixtures can be safely rewired. The process involves removing all old wiring, replacing sockets with modern UL-listed components, and adding a continuous ground wire bonded to the metal frame. Use 18 AWG, 600V-rated wire that matches the original’s outer diameter so it fits through narrow arms. Pay special attention to sharp edges inside tubular brass arms—use Teflon sleeves at each opening. A rewired fixture should be tested with a multimeter for continuity and insulation resistance before it goes up.
What are the most common electrical issues with mid modern chandeliers?
The three most frequent issues I encounter are loose wire splices inside a shallow canopy, missing or broken ground connections, and mismatched bulb wattage that overheats sockets. Often the fixture arrives with a European-style terminal block instead of wire leads suitable for the US, forcing an installer to make improvised connections that aren’t secure. Another pet peeve is the use of plastic mounting nuts that crack after a single tightening—always replace those with metal lock nuts if present. These problems are avoidable with a thorough pre-install check.
