

Most people grab a cheap round craft mirror, slap it onto a piece of poster board with all-purpose glue, and call it a day. I did that. The mirror cracked at the edge two days later, and the glue released a faint, sour smell that ruined the silvering. My take? The common advice that “any mirror works for crafts” is flat-out wrong — and dangerously so if you have kids handling the project. Durability starts before the mirror ever meets the glue. When I work with round craft mirrors, the first thing I consider is the edge — a raw glass edge can be a serious hazard in a craft setting, so I either sand it with a fine grit or buy a pre-finished bevel. I also never use standard household glue on glass; it will eventually fail, so I rely on mirror mastic or a strong cyanoacrylate like E6000. Beginners often ignore the backing, but a proper mirror felt or cork backing protects both the wall and the mirror. If you’re building something that needs to last and look clean, those three decisions matter more than the mirror’s size or the color of the frame.
Key Takeaways
- Glass round craft mirrors need edge finishing or a pre-bevelled profile to prevent cuts and cracking; acrylic mirrors trade scratch resistance for lightweight safety.
- Never use household glue or hot glue — only mirror mastic or solvent-based cyanoacrylate (E6000) bonds glass without corroding the reflective backing.
- A felt or cork backing plus a correctly rated mirror hanger eliminate wall damage and black spot deterioration over time.
Choosing Between Glass and Acrylic Round Craft Mirrors
The first fork in the road isn’t the design — it’s the material. I keep a stack of 6‑inch glass rounds and a few acrylic sheets in the workshop because each one behaves like a completely different animal when adhesive touches it or when a project gets knocked off a shelf. This choice determines everything downstream: weight, glare, the tools you’ll need, and whether that mirror survives a five‑year‑old’s art project.
Glass Mirror: When Beauty Wins Over Safety
A real glass round craft mirror gives you true reflectivity. There’s no warped, funhouse distortion you get with thin acrylic. The catch is fragility. Standard glass used in craft mirrors is typically 2mm to 3mm thick float glass with a silver backing, and the edges are often raw-cut from the factory. A raw glass edge has micro‑fissures that spiderweb under pressure — drop it once on a tile floor, and you’re not just sweeping up shards, you’re dealing with razor‑sharp splinters. Glass mirrors sold in the U.S. for decorative use should comply with the ANSI Z97.1 safety glazing standard, but many craft store imports skirt this entirely. If the packaging doesn’t mention Z97.1 or tempered glass, handle the edge as if it’s unfinished.
Weight matters. A glass 12‑inch diameter round weighs roughly 1.5 to 2 pounds, depending on thickness. That’s heavy enough to pull standard double‑sided tape off a wall within days. Even with a good hanger, you’ll need to consider the substrate — drywall without an anchor can blow out around 10 pounds, and if your craft includes multiple mirrors clustered together, the load climbs fast.
Acrylic Mirror: Lighter and Safer for Kids, But Not Bulletproof
Acrylic round craft mirrors are cut from extruded or cast acrylic sheets with a vacuum‑metalized reflective coating on one side. They weigh about half what glass does and they won’t shatter into jagged pieces — they’ll crack or snap but leave blunt edges. For children’s craft projects, that’s a game‑saving difference. A 4‑inch acrylic mirror dropped from a desk might scratch, but it won’t send anyone to the ER.
The trade‑off you’re making is clear: acrylic scratches if you breathe on it wrong. Even a paper towel will leave micro‑abrasions over time. Cleaning requires a specific touch (more on that later), and adhesives that work perfectly on glass can haze or craze acrylic if they contain solvents. I’ve ruined a brand‑new sheet by using a spray adhesive that literally melted the reflective layer into a cloudy mess. If you’re framing an acrylic mirror, test your glue on a corner scrap first.
How to Decide Based on Your Project
I simplify it to three questions. Will humans under the age of 10 interact with the piece? Acrylic. Does the mirror need to look optically flat from more than a foot away? Glass. Are you mounting it on something flexible like canvas or fabric? Acrylic because glass will crack when the substrate bends. That third one trips up a lot of beginners — you can sew an acrylic mirror round onto a denim jacket. You can’t do that with glass unless you want a wearable hazard.
Preparing the Mirror: Edge Finishing and Safety First
I never open a pack of glass round craft mirrors and start gluing immediately — not after the first time I pulled my hand back and found a line of blood I hadn’t even felt. The edge is the entire weak point of a mirror, and finishing it changes the whole safety profile of the project.
What to Do with a Raw Glass Edge
If your mirror arrived with a sharp, unpolished edge, you’ve got three practical options.
1. Wet‑sand it by hand. Wear cut‑resistant gloves. Use 400‑grit wet/dry sandpaper on a small block, keep the paper and glass wet with a trickle of water, and work in one direction along the edge — not back and forth. The goal is to knock off the microscopic peaks that concentrate stress, not to create a polished bevel. One pass around the entire circumference at 400‑grit is enough to prevent the sharpest cuts. Blow the mirror dry immediately and check the backing for water intrusion; moisture is the enemy of the silvered layer.
2. Seal the edge with a flexible coating. For a lower‑effort fix, paint a thin layer of clear acrylic nail polish or a dedicated glass edge sealer along the entire rim. It won’t soften the edge to the touch, but it encapsulates the micro‑cracks and adds enough tensile strength to stop a small chip from turning into a full crack. Let it cure overnight before handling.
3. Buy pre‑bevelled mirrors. This is what I recommend most of the time. A factory‑finished bevel is ground at a consistent angle and polished, so the sharp corner is gone. The bevel also catches light in a way that elevates the craft’s look, giving the mirror a framed appearance without adding any material. Yes, bevelled rounds cost a little more, but the time and injury you save make the price difference irrelevant.
Acrylic Edge Finishing: Sanding and Polishing
Acrylic edges from craft packs are usually clean but slightly rough from the saw cut. A quick pass with 600‑grit sandpaper, followed by a flame‑polish (carefully — a butane torch passed quickly over the edge melts the surface and restores clarity), gives you the best result. If fire isn’t your thing, Novus #2 plastic polish on a soft cloth brings back a glossy transparency with less drama.
Adhesive and Mounting: Stop Using Regular Glue on Mirrors
I’ve peeled failed mirrors off more backing boards than I care to count, and the culprit is always the same: the wrong adhesive. Household white glue, hot glue sticks, and even many wood glues simply don’t bond to glass’s non‑porous surface for more than a few weeks under load. Worse, the acids and solvents in some adhesives react with the mirror’s silver backing, creating black spots that eat through from the back.
Mirror Mastic vs. E6000: Which One Actually Holds
Mirror mastic (often labeled as mirror adhesive by brands like CRL or Loctite) is a neutral‑cure, solvent‑based material developed specifically for this job. The key is “neutral‑cure” — acidic silicone caulk will corrode the silver on the back of the mirror in under six months. Professional mirror installers use neutral‑cure mastic because it stays slightly flexible, won’t dry into a brittle shell, and creates a tenacious grip on porous surfaces like wood and MDF. For a craft setting, you don’t need a full caulk gun load; a small tube dispensed in pea‑sized drops every 2 inches around the back perimeter gets the job done.
E6000 is my go‑to when the mirror is small and the adhesive joint won’t be exposed to constant moisture, like in a bathroom. It’s a solvent‑based cyanoacrylate‑polyurethane hybrid that stinks to high heaven while curing but forms an unbelievably strong, rubbery bond. The trick with E6000 is clamping time: 24 hours minimum at 70°F. If you release pressure after two hours because the outside feels tack‑free, the inner layer hasn’t cured yet and the mirror will slide or pop. For a 12‑inch glass round, I either set a hardcover book on top or tape it down with blue painter’s tape overnight.
Hanging Hardware That Won’t Rip Out Your Wall
A standard picture‑hanging hook with a single nail can support maybe 5 pounds before it starts ovaling the drywall hole. Many 10‑inch and larger glass craft mirrors approach that weight, and if you’re mounting directly to the wall without a backer board, failure is a matter of time. I use mirror hangers — stamped metal clips with a bottom shelf and a top tension arm — that distribute the weight to the wall’s surface rather than a single point. A pair of mirror hangers rated for 20 pounds can safely hold a round craft mirror up to about 16 inches in diameter. If you’re looking at larger pieces, a complete guide to hanging a 48‑inch round mirror covers the heavy‑duty cleat systems those demand, but the same principles of weight distribution apply at any scale.
Preventing Black Spots and Edge Corrosion
Black spots on a mirror are a slow‑motion disaster. They start as tiny gray pinholes near the edge and, left unchecked, spread inward like mold, rendering the mirror useless. The cause isn’t dirt on the front — it’s moisture and chemical reaction attacking the reflective backing.
Why Those Dark Blotches Appear
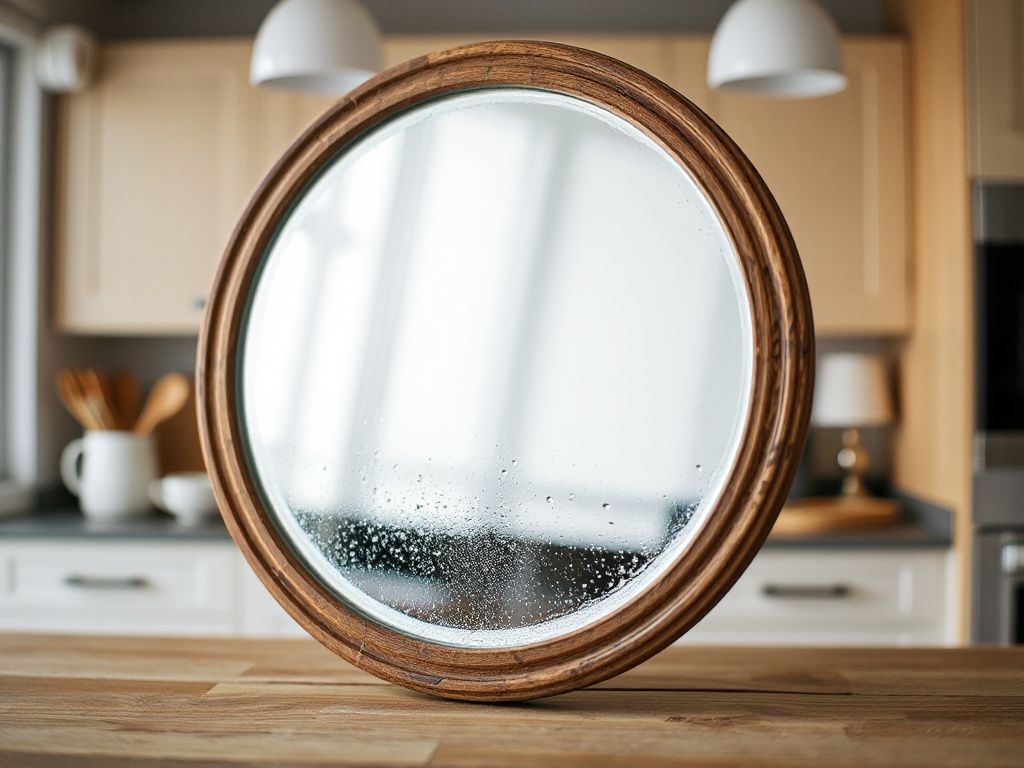
A glass mirror is not a solid silver plate; it’s a thin layer of silver or aluminum deposited on the back of the glass, protected by a coat of paint (usually copper‑toned or gray). When water, humidity, or acidic substances reach that metal layer, corrosion begins. The black you see is the oxidized metal and the resulting delamination. Edge deterioration happens fastest because that’s where the protective paint coating is thinnest and where the glass‑coating interface is most exposed. Every time you wash the mirror and moisture wicks around the edge, you’re accelerating the process.
Protecting the Mirror’s Back with Felt or Cork
I back every craft mirror that lives in a frame or hangs on a wall with a layer of adhesive felt or thin cork sheet, cut to the same diameter. The felt creates a breathable, moisture‑wicking barrier that keeps the painted back from sitting directly against a potentially damp surface — like an exterior wall or a humid basement craft room. Apply the felt after the mirror is secured to its hanging hardware, using a spray adhesive only on the felt side, never directly on the mirror back. The spray adhesive stays on the felt where it can’t touch the silvering. For outdoor or high‑humidity projects (think garden art), I’ll seal the entire mirror back and edges with a coat of solvent‑based waterproofing paint, letting it drip over the edge to encapsulate the vulnerable perimeter.
Moisture Barriers in High‑Humidity Rooms
If your round craft mirror is destined for a bathroom frame or a greenhouse craft display, add a moisture barrier step. After gluing the mirror into its backer board, run a thin bead of clear silicone caulk around the entire perimeter where the glass meets the frame material. This physical dam prevents steam from condensing at the edge and working its way behind the glass. It’s a five‑minute step that can extend the mirror’s life from months to years.
Cutting a Round Mirror to a Smaller Size (Only If You Have To)
I get asked this often enough that I need to address it: “Can I cut down a 12‑inch round craft mirror into a 6‑inch circle?” The short answer is, “Technically yes, but you probably shouldn’t.” The long answer involves glass scoring tools you may not own and a failure rate that leaves you with jagged scrap.
The Proper Tools for Cutting Glass Circles
Cutting glass in a curve demands a circle cutter with a carbide wheel and a suction‑cup pivot that sticks to the center. A standard straight glass cutter and a steady hand won’t produce a clean, chip‑free curve on such a small diameter — the radius is too tight, and the score will wander. The tool alone costs more than a pack of new mirrors. You also need a felt‑covered work surface, cutting oil, and running pliers. Given the low cost of pre‑cut round craft mirrors, the math rarely favors a DIY cut.
Step‑by‑Step Scoring and Breaking
If you must try: clean the glass, mark the center, set the circle cutter, and make a single, continuous score with even pressure. Do not go over the line twice — that creates a ragged fracture path. After scoring, tap the underside of the score line with the ball end of the cutter to deepen the break until you hear a distinct change in pitch. Then break along the line by holding the mirror face‑up and applying upward pressure from below the scored circle, working your way around. Expect about a 30% failure rate if you’ve never done it before. Wear eye protection.
Why Acrylic is Far Easier to Cut
Acrylic mirror cuts with a fine‑toothed saw or a heavy‑duty scoring knife. Score the acrylic deeply along the desired circle, snap it along the line, and sand the edge. No glass dust, no splinter hazard. For any project that requires a custom shape, I lean heavily toward acrylic for exactly this reason. The risk of a ruined glass piece simply isn’t worth it, particularly when a rounded corner mirror might already give you the organic shape you want without breaking out cutting tools.
Framing and Finishing a Round Mirror Professionally
A framed round craft mirror lifts a simple wall decoration into something that looks intentional and gallery‑worthy. The frame also does double duty — it catches the mirror’s edge, shielding those vulnerable millimetres from bumps and knocks that cause fractures.
Simple Frame Techniques Using Cardboard or Wood
The easiest approach for a lightweight mirror is to cut two circles of double‑thick corrugated cardboard slightly larger than the mirror, then use the mirror as a template to cut a center hole in one layer. Sandwich the mirror between the solid cardboard back and the hole‑cut front, glue the layers together, and you have a built‑in frame ledge. Paint or wrap the cardboard before assembly. For a wood frame, a circle engraving jig on a router can mill out a recess slightly deeper than the mirror’s thickness, and a round of plywood can be cut to the outer diameter. Insert the mirror from the back, then secure it with glazier’s points and a felt backing. Both methods protect the mirror edge completely.
Decoupage and Painted Frames
If the mirror itself is already mounted and you want to add visual flair without building a physical frame, decoupage works beautifully on the surrounding surface. Apply thin papers — tissue, napkin layers, or rice paper — with Mod Podge around the mirror, beginning from the glass edge outward. The key is to seal the paper completely so moisture from the Mod Podge doesn’t wick under the mirror. I always run a fine bead of clear acrylic paint around the mirror‑substrate joint before decoupaging, letting it dry, then proceeding. That tiny seal stops the adhesive from lifting the silver off the back. Shabby chic paint techniques with chalk paint and a dry brush around the rim also work well and hide any adhesive squeeze‑out.
Using a Mirror Frame Kit
For a hyper‑professional finish, pre‑made round mirror frame kits exist in many craft and online shops. They’re typically MDF with a routed circle center and come with hangers attached. You just drop the mirror in from the front, secure the back tabs, and hang. I’ve used these for a door mirror project where I wanted a cohesive look with other framed reflective accents, and the consistency in depth and finish was worth the extra cost.
Cleaning Round Craft Mirrors Without Streaks or Scratches
A finished craft mirror that’s smeared with fingerprints and streaked with cleaner looks worse than no mirror at all. The cleaning method differs drastically between glass and acrylic — one wrong move with a paper towel will haze an acrylic surface permanently.
The Right Cloth and Cleaner for Glass and Acrylic
For glass round craft mirrors, a drop of isopropyl alcohol mixed 50‑50 with distilled water in a spray bottle, wiped with a microfiber cloth, yields a lint‑free, streak‑less shine. Avoid ammonia‑based glass cleaners near any adhesive joints — ammonia can seep to the backing and accelerate silver corrosion. Don’t spray directly onto the mirror; spray the cloth and then wipe, minimizing liquid at the edge.
For acrylic mirrors, skip the alcohol. Use a dedicated acrylic cleaner (Novus #1 or Brillianize) or plain water with a tiny drop of mild dish soap. The cloth must be soft, clean, and slightly damp — never dry. Micro‑abrasions from dust particles being dragged across the surface will build up into a noticeable haze over time. Rinse the cloth frequently and pat, don’t rub, the surface dry.
Removing Grime from Crevices
If your mirror frame or mounting surface has collected dust or adhesive residue, a soft‑bristled toothbrush dampened with warm water works wonders around the edge without scratching. For stubborn sticker residue on the glass’s front, a dab of vegetable oil left to soak for five minutes dissolves the adhesive safely; follow up with the alcohol wipe.
Frequently Asked Questions
What’s the difference between a bevelled edge and a flat edge on a round craft mirror, and does it matter for crafts?
A bevelled edge is ground at an angle (typically 1 inch wide on larger mirrors, narrower on small rounds) so the edge slopes away from the front, making it less sharp and more reflective. A flat edge is cut straight through the glass thickness. For crafts, the bevel matters tremendously: it eliminates the cutting hazard, adds a prismatic light effect that elevates the piece’s finish, and typically indicates the manufacturer applied a better edge seal. If safety or a polished look is key, choose bevelled.
Can I use a standard mirror hanger on a 24‑inch round craft mirror?
A standard mirror hanger set — two bottom brackets and two top tension clips — can work for a 24‑inch glass round, but you must verify the combined weight rating matches the mirror’s actual weight (usually 8 to 12 pounds for that size). More importantly, the fasteners going into the wall must be anchored correctly. For drywall, use screw‑in anchors rated for at least 20 pounds each, not expansion plugs. Bolt the hanger into a stud if at all possible. If the mirror is acrylic at that diameter, the weight drops enough that a single heavy‑duty picture hanger may suffice, but clips still provide better stability.
Are there non‑toxic adhesive options for kids’ mirror craft projects?
Yes, but they come with trade‑offs in holding power. For lightweight acrylic mirrors on paper or wood, clear craft gel with a “non‑toxic” label (like Aleene’s Clear Gel Tacky Glue) can work, provided the mirror is under 4 inches and the piece won’t be handled aggressively. The bond is weaker than solvent glues, so it’s not a choice for glass. A better kid‑safe approach is to avoid glue entirely by using a frame that mechanically traps the mirror — think a wooden embroidery hoop that clamps the mirror between layers — so no chemical adhesive touches the mirror at all.
