
I’ll be honest with you.
I’ve always been a sucker for vintage furniture. You know, the kind that looks like it has a story to tell. And lately? I’ve been obsessed with step stools.
Yeah, I know. Step stools sound boring, right?
But hear me out. These aren’t your grandma’s plain wooden stools shoved in the back of a closet. We’re talking about gorgeous, conversation-starting pieces that actually make your home feel warmer.
Here’s the thing about vintage-inspired step stools. They’re not just about function. Sure, they help you reach that top shelf. But they also work as plant stands, extra seating, or even decorative pieces that catch everyone’s eye.
And the best part? They never go out of style.
Unlike that trendy furniture you bought three years ago (we all have one), vintage designs stick around. They fit perfectly in a farmhouse kitchen. They look amazing in a cottage bedroom. Heck, they even work in an eclectic living room.
In this article, I’m walking you through fifteen different ways to build your own vintage step stool. Some are super simple for beginners. Others are more detailed if you’re up for a challenge.
Each design comes with specific tips on materials, colors, and construction methods. Whether you’ve been woodworking for years or you’re just starting out, there’s something here for you.
Ready to get started? Let’s build something beautiful.
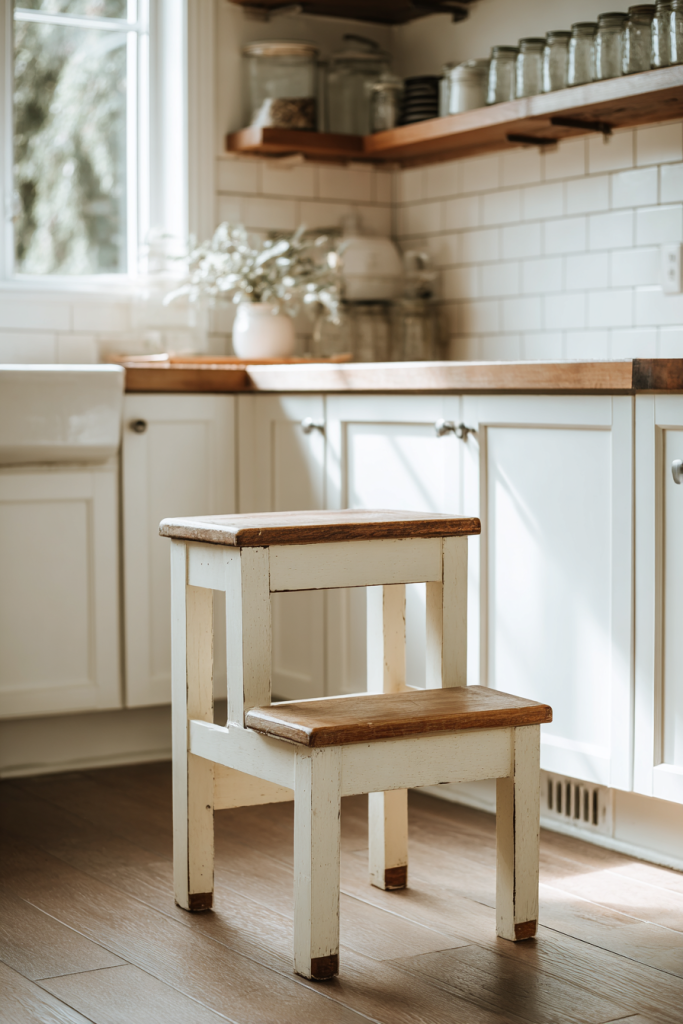
1. Classic Farmhouse Two-Step
This is where I started my step stool journey.
The farmhouse two-step is classic for a reason. Clean lines. Sturdy build. Nothing fancy, but it just works.
The two-step height is perfect for reaching those upper cabinets without feeling like you’re climbing Mount Everest. And it doesn’t take up much floor space, which is huge if your kitchen is already cramped.
I love how versatile this style is. I’ve built these for kitchens, bathrooms, and bedrooms. They fit everywhere.
What wood should you use?
Go with solid pine or oak. Look for pieces with visible grain patterns that’s where the character comes from. Sand down the edges a bit to give it that worn, lived-in feeling.
Color choices:
Think classic farmhouse here:
- Cream white
- Sage green
- Soft gray
Pro tip: Paint the body in your chosen color, but stain the top step in natural wood. That contrast? Chef’s kiss.
Construction notes:
Don’t skip the wood glue. Seriously. Use it with your countersunk screws at every joint. This isn’t just about looks you need maximum stability.
Keep it simple. The charm of this design is in its simplicity, not in fancy details. A little distressing on the corners adds character, but don’t go overboard.
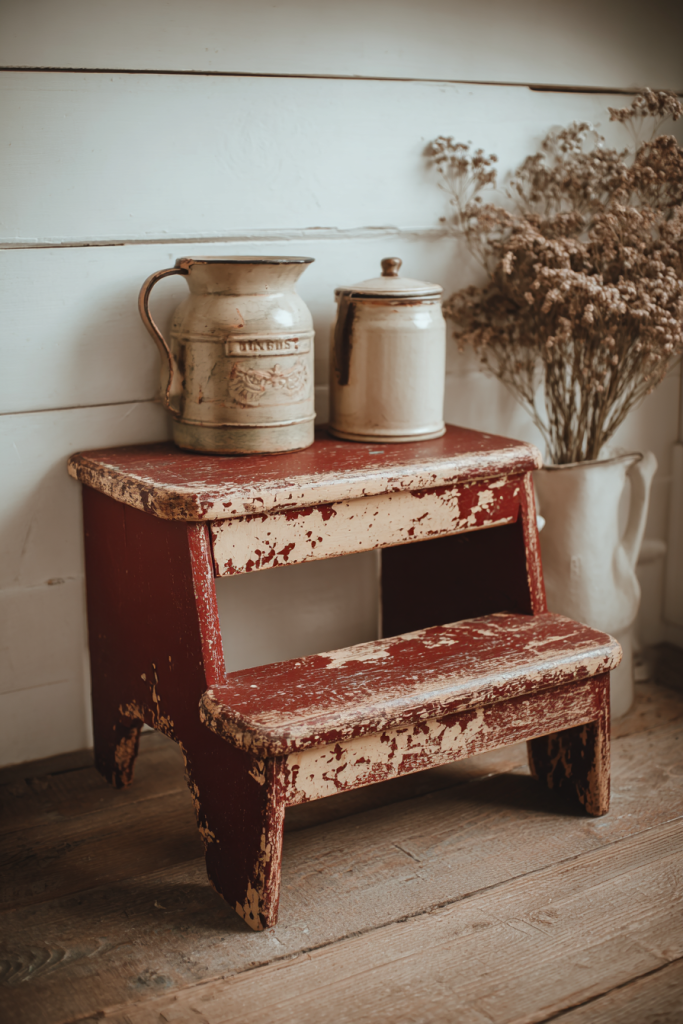
2. Milk Paint Chippy Finish
Want to know the secret to authentic vintage appeal?
Milk paint.
Nothing and I mean nothing looks quite like the chippy, weathered finish you get from milk paint. I discovered this technique about two years ago, and it completely changed how I approach vintage projects.
The matte finish is gorgeous. But the real magic? How it ages naturally over time.
Here’s how to do it:
Start with traditional milk paint colors. Barn red is my favorite, but mustard yellow and colonial blue are stunning too.
Apply multiple thin coats. Let each one dry completely. I know it’s tempting to rush this step. Don’t.
Now for the chippy effect. Before your final paint layer, apply petroleum jelly or wax to areas where natural wear would happen. Think corners, edges, spots where hands would grip.
When the final coat dries, gently sand those waxed spots. The paint will peel away in the most beautiful way, revealing the layers underneath.
The best part?
Every piece turns out different. You can’t replicate it exactly, which means your stool is truly one-of-a-kind.
Finish with a coat of clear wax for a soft sheen that protects without looking glossy.
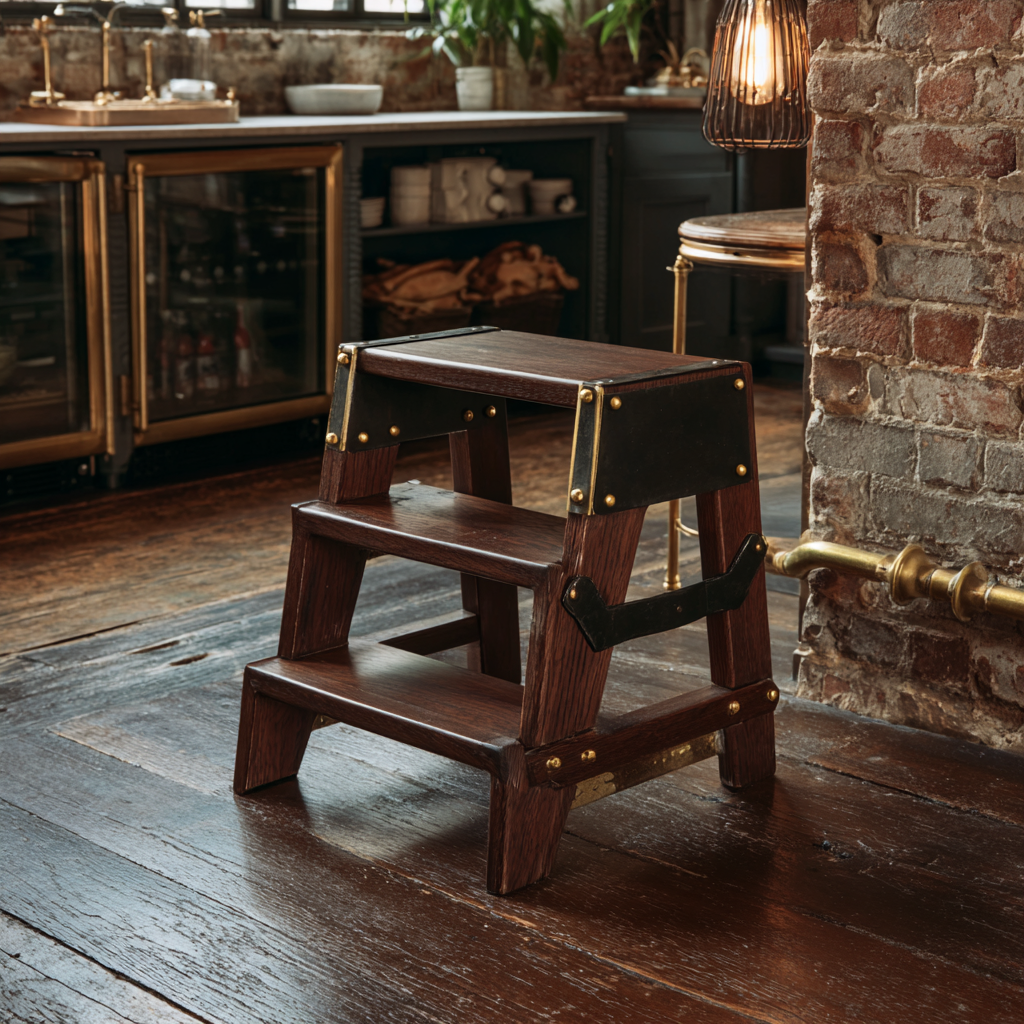
3. Vintage Industrial Metal Accent
Okay, this one’s for the industrial-style lovers out there.
I built one of these last month for my sister’s loft apartment, and she won’t stop talking about it. The combination of wood and metal? It’s trending hard right now for good reason.
This design takes a basic wooden stool and adds metal details that completely transform it. Corner brackets. Handles. Leg caps. These aren’t just pretty they actually add structural support too.
Hardware choices:
Look for aged brass, copper, or black iron. The key word here is “aged.” Shiny new hardware won’t give you that vintage vibe.
My favorite hunting grounds? Salvage yards and flea markets. You can find genuinely unique pieces that add so much character.
Wood finish:
Go dark here. Rich walnut or deep espresso stains complement the metal beautifully. The contrast is what makes this design pop.
Installation tips:
Put those corner brackets at stress points. They’re doing double duty looking good and keeping your stool stable.
Add metal handles on the sides. Trust me, you’ll appreciate being able to grab and move this thing easily.
Consider metal corner guards on the steps. High-wear areas need protection, and these look amazing while doing the job.
This style absolutely kills it in loft apartments and modern farmhouse spaces.
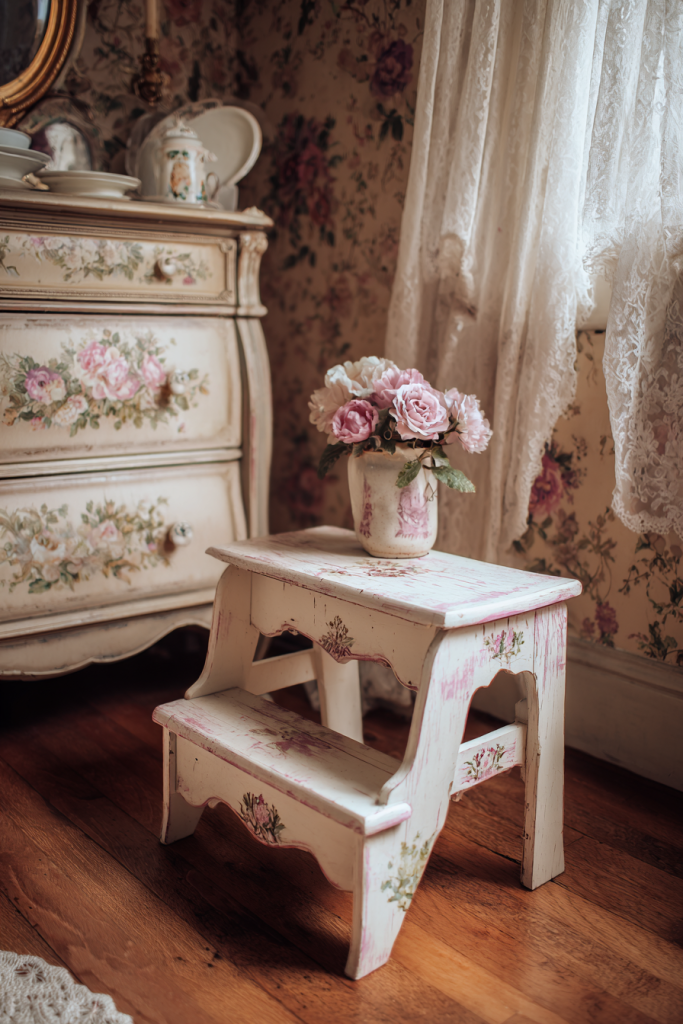
4. Scalloped Edge Cottage Style
Fair warning: this one takes a bit more work.
But oh man, is it worth it.
Scalloped edges add this delightfully feminine touch that’s perfect for cottage or shabby chic spaces. I remember the first time I tried this technique my hands were shaking while using the jigsaw. But once I saw the final result? I was hooked.
Here’s what you need:
A jigsaw and a steady hand. That’s really it. Plus some patience.
The process:
Draw your scallop pattern on cardboard first. This is your template, and getting it right here saves you headaches later.
Transfer the pattern to your wood’s edge. Take your time with this step.
Cut carefully with the jigsaw, then sand those curves smooth. And I mean smooth. This is what separates a professional-looking finish from an amateur one.
Color palette:
Soft pastels are your friend:
- Blush pink
- Powder blue
- Mint green
Design placement:
Focus on the side panels and front edges of the steps. Keep your scallop size proportional bigger stools get larger scallops, smaller stools need delicate ones.
A light distressing along the curves enhances that vintage cottage feel. This style looks absolutely beautiful with floral fabrics and romantic décor.
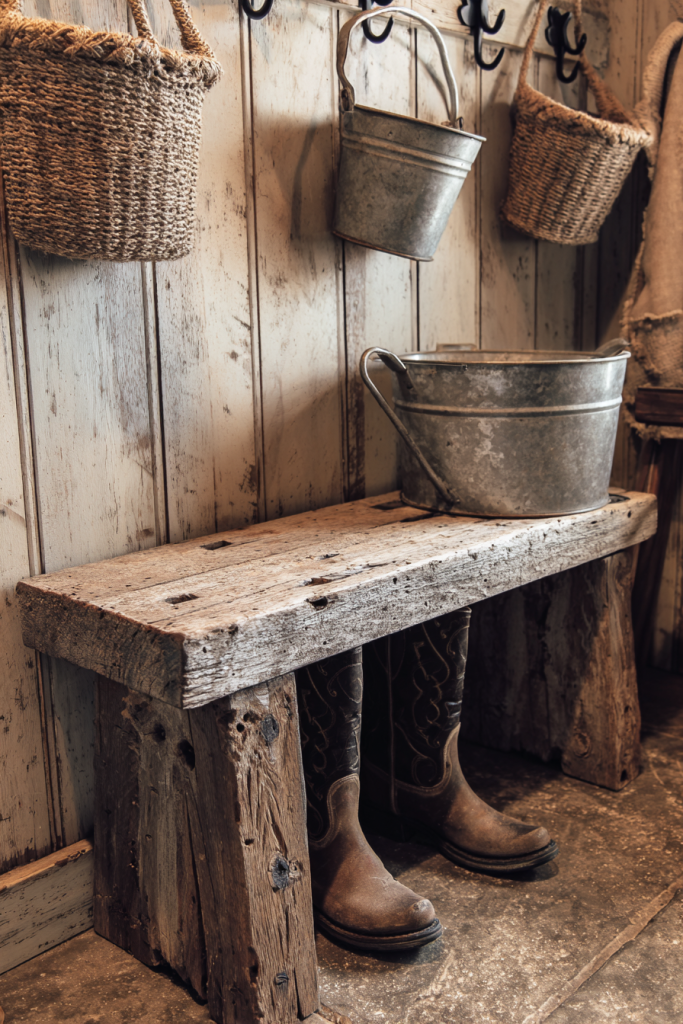
5. Reclaimed Barn Wood Beauty
This is my absolute favorite style to build.
There’s something almost magical about working with century-old barn wood. The weathered texture. Those nail holes. The natural patina that develops over decades.
Every time I build with reclaimed wood, I feel like I’m preserving a piece of history. And honestly? The results speak for themselves.
Where to find barn wood:
Architectural salvage yards are gold mines. Demolition sites too. I’ve even scored amazing pieces from old barns being torn down in rural areas.
What to look for:
Character marks are your friend here:
- Wormholes (yes, really!)
- Saw marks
- Weathering patterns
- Old nail holes
Important: Clean the wood thoroughly, but don’t remove the aging. That’s where all the beauty lives.
The golden rule:
Avoid heavy sanding. I see people make this mistake all the time. They sand away all that gorgeous patina trying to make it “perfect.”
Don’t do it.
Embrace those imperfections. Exposed nail holes? Keep them. Cracks? They add authenticity. Natural variations between pieces? That’s visual interest right there.
For finish, just use a clear matte sealer. You want to protect the wood while keeping that raw, weathered look intact.
This style absolutely shines in rustic or modern farmhouse settings.
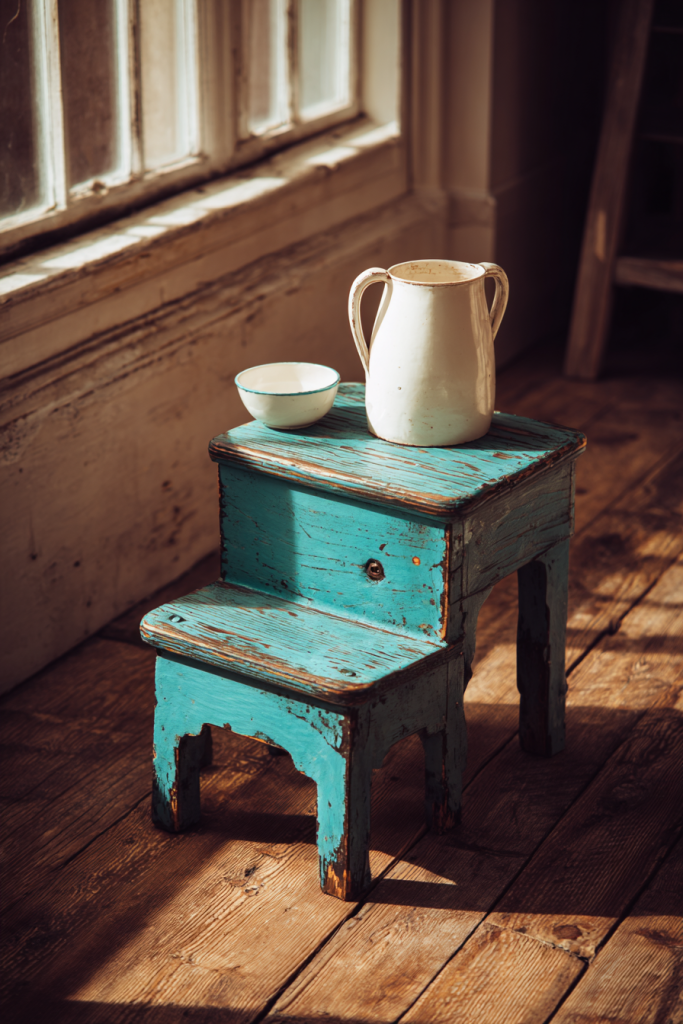
6. Two-Tone Painted Contrast
Let me tell you about color blocking.
It’s a simple technique that creates major visual impact. I love how two-tone designs photograph they just pop in a way that solid colors don’t.
The concept is straightforward. Use two complementary colors to highlight different parts of your stool. Simple, right?
Color combinations that work:
- Navy and white (classic)
- Charcoal and natural wood (modern)
- Sage green and cream (farmhouse)
The process:
Paint your main body in your primary color. Then paint the steps or legs in your accent color. Use painter’s tape between sections for those crisp, clean lines.
Design tip:
Think about where your colors meet. Natural break points work best where steps attach to the frame, where legs meet the body. These transitions should feel intentional, not random.
After painting, sand the edges slightly. This gives you that vintage worn look that ties everything together.
Bold contrasts work great. But subtle tonal variations are equally beautiful. The key is making sure your color placement enhances the stool’s structure rather than fighting against it.

7. Vintage Folding Design
Small space? This one’s for you.
Folding step stools are brilliant because they give you vintage charm plus space-saving functionality. I have one in my tiny apartment bathroom, and I can tuck it away when guests come over.
The folding mechanism itself becomes a design element. Especially when you add vintage hardware into the mix.
Hardware hunting:
Check antique stores and online marketplaces for vintage folding hardware. Brass or black iron hinges with authentic aging are what you’re after.
These period details make all the difference between “cute” and “wow, where did you find that?”
Construction notes:
Test your folding mechanism constantly during the build. Open it. Close it. Open it again. It needs to move smoothly every single time.
Add rubber bumpers where metal touches metal. This prevents annoying squeaking and protects your hardware from wear.
Pro tip: Paint or stain everything before installing the hardware. You’ll thank me later when you’re not trying to do tiny touch-ups around metal pieces.
Where to use it:
This design is perfect for:
- Kitchens (fold it away after use)
- Bathrooms (space is always tight)
- Craft rooms (only need it sometimes)
Any place where space is at a premium but you still want that vintage aesthetic.

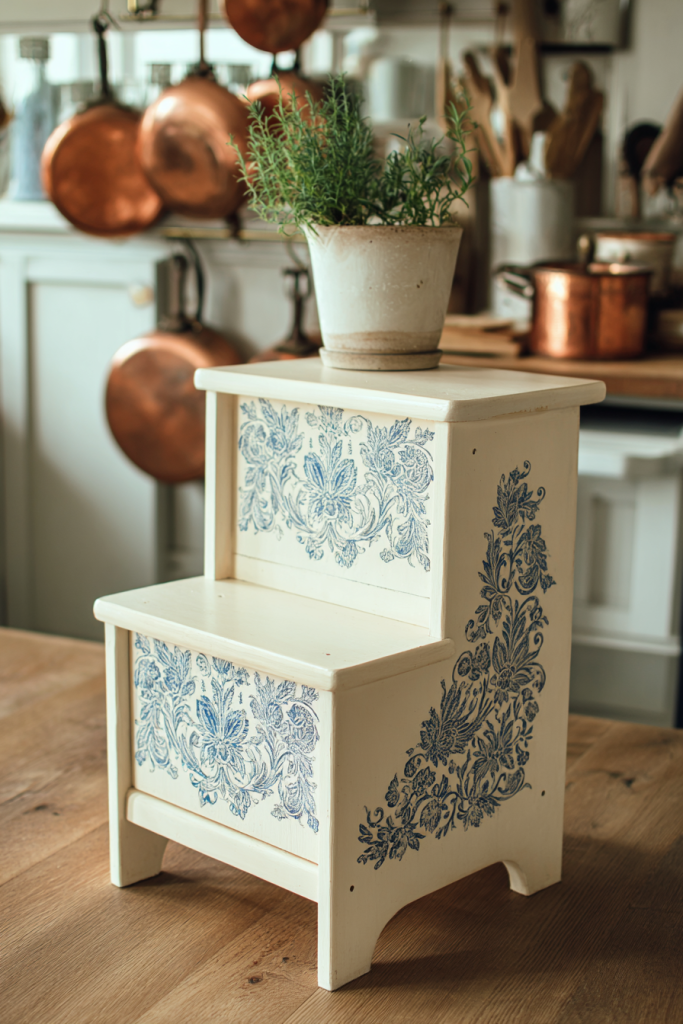
8. Stenciled Pattern Detailing
Want to add a personal artistic touch?
Stenciling is your answer.
This technique takes a simple stool and transforms it into genuine folk art. I love stenciling because it lets you incorporate patterns and motifs that reflect your style, not just what’s trendy.
Pattern choices for vintage vibes:
- Florals (always beautiful)
- Damask (elegant)
- Geometric tiles (modern vintage)
- French typography (très chic)
The technique:
Paint your base color first. Let it dry completely. I know waiting is hard, but trust me on this.
Use stencil adhesive spray to secure your pattern. This prevents paint from bleeding under the edges nothing ruins a stencil faster than blurry lines.
Apply your stencil paint with a dabbing motion. Use a stencil brush, not a regular paintbrush. The difference is huge.
Where to stencil:
- Step surfaces (high visibility)
- Side panels (statement piece)
- Front risers (subtle detail)
You can even use multiple coordinating patterns. Just vary their scale and placement so it doesn’t feel overwhelming.
Seal everything with polyurethane to protect your artwork from daily wear. Then lightly distress over the stenciled areas for that aged appearance.
This technique is perfect for farmhouse, French country, or cottage styles.
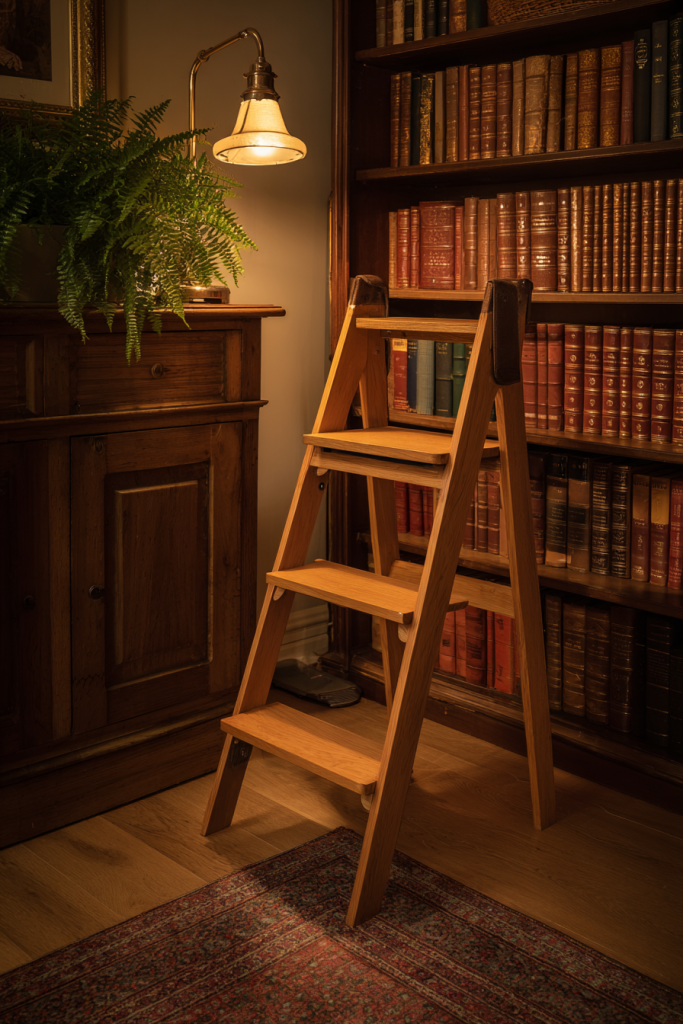
9. Ladder-Style Step Stool
Need to reach higher?
The ladder-style design is your friend.
This taller, more substantial option gives you multiple steps while keeping a slim profile. I built one for my home library last year, and it’s become my favorite piece in the room.
Construction requirements:
Use sturdy hardwood. Oak or maple are ideal. You need strength and stability here this isn’t the project for softwoods.
The uprights should extend above the top step. These act as handles, which is crucial for safety when you’re up high.
Step spacing:
Space your steps evenly at eight to ten inches apart. This creates comfortable climbing without feeling like you’re doing gymnastics.
Sand every edge smooth. Splinters are not vintage charm they’re just painful.
Finishing options:
You can paint in classic colors, or leave the natural wood visible with a protective finish. Both look amazing.
Add non-slip tape or textured paint to the step surfaces. Safety first, always.
Bonus feature:
Even when you’re not using it, this style works as a decorative accent. Lean it against a wall in your kitchen, library, or bathroom. Instant vintage charm.
Consider adding a small shelf at the top for plants or decorative items. It’s functional and beautiful.
10. Distressed Paint Technique
Let’s talk about distressing.
This technique creates an aged appearance that looks like your stool has been loved for generations. And here’s the best part it’s actually pretty forgiving. Made a mistake? Just distress it more. Problem solved.
I love how distressing adds character while naturally hiding future wear and tear. It’s like built-in protection for your paint job.
The basic method:
Start with a painted base in your chosen vintage color. Let it dry completely.
Grab medium-grit sandpaper and remove paint from areas that would naturally wear over time:
- Corners
- Edges
- High-touch spots
The secret to realistic distressing:
Focus on creating believable wear patterns. Think about where hands would grip, where feet would scuff, where the stool would bump against walls.
Random distressing looks fake. Strategic distressing looks authentic.
Level up your technique:
Apply dark wax or glaze over the painted surface. Then wipe away the excess. What remains settles into crevices and creates beautiful depth.
Want even more character? Use a hammer or chain to add dents and dings. Sounds crazy, but it works.
Seal everything with matte polyurethane when you’re happy with the look.
Important: Less is more. It’s tempting to go wild with distressing, but restraint usually looks better. You can always add more you can’t take it back.
11. Curved Leg Elegance
Okay, I won’t lie to you.
This one’s more challenging. Curved legs require advanced woodworking skills and some specific tools.
But the results? Absolutely stunning.
Curved or tapered legs transform a basic step stool into an elegant furniture piece. I remember the first time I successfully shaped curved legs I felt like a real craftsperson.
Tools you’ll need:
A bandsaw or jigsaw. And a carefully drawn template. Seriously, take time on that template. It’s your roadmap.
Shaping process:
Follow your template closely while cutting. Then sand those curves thoroughly until you achieve smooth, flowing lines.
Your curves can be subtle or dramatic. It’s really about your style preference:
- Subtle curves: Modern farmhouse
- Pronounced curves: Victorian or French provincial
Finishing options:
Stain curved legs in rich wood tones. This showcases their graceful lines beautifully.
If you’re painting, use contrasting colors between the legs and body. This emphasizes the curves rather than hiding them.
Critical safety note:
Make sure your leg design doesn’t compromise structural integrity. Maintain adequate thickness at all points. A beautiful curved leg that breaks under weight helps nobody.
This style pairs beautifully with traditional, cottage, or shabby chic interiors. Add decorative details like grooved lines or carved accents for extra elegance.
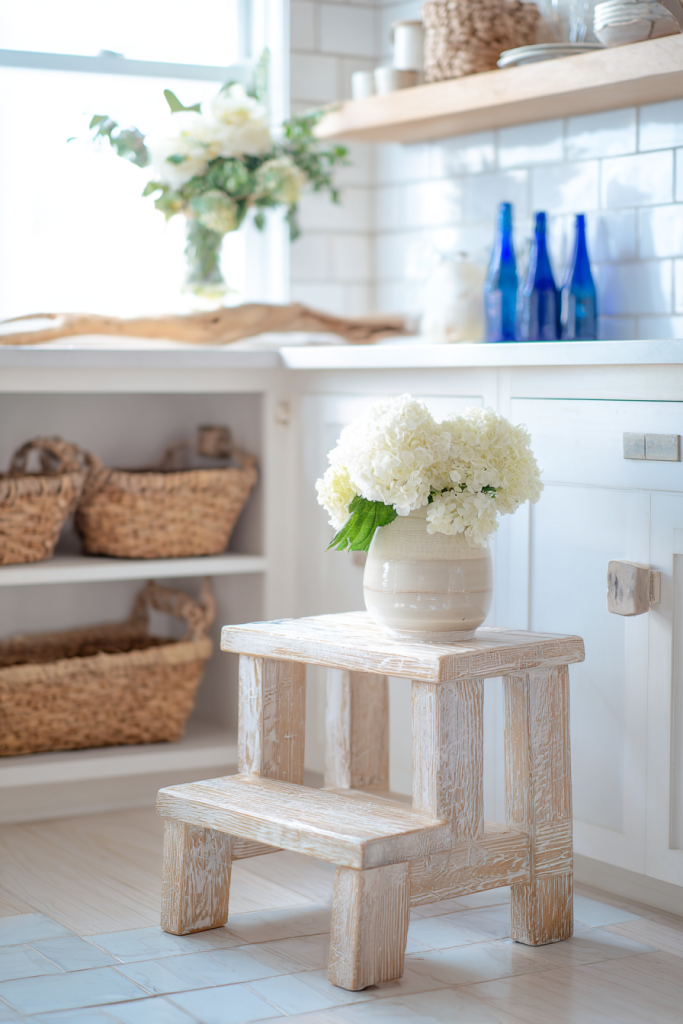
12. Whitewashed Rustic Finish
Whitewashing is one of those techniques that looks complicated but is actually super simple.
And the results? Beautiful every single time.
This technique brightens wood while preserving its natural grain and texture. I love it for coastal, Scandinavian, or farmhouse styles. It adds light to a space without losing that rustic character.
The simple recipe:
Mix white paint with water in a one-to-one ratio. That’s it. That’s your whitewash solution.
Application method:
Apply liberally with a brush. Then and this is important immediately wipe with a clean cloth, following the wood grain.
Here’s the trick: The longer you wait before wiping, the more opaque the coverage becomes. Want it lighter? Wipe right away. Want more coverage? Wait a bit.
Pro tips:
Apply multiple thin coats instead of one heavy coat. This gives you way more control over the final look.
You can whitewash over bare wood or existing stains. Both create different effects, so experiment on scrap pieces first.
Seal with matte or satin polyurethane to protect your finish.
Best woods for whitewashing:
- Pine (shows grain beautifully)
- Cedar (gorgeous texture)
- Reclaimed wood (instant character)
The technique highlights natural beauty while adding that vintage, beachy feel I absolutely love.
13. Vintage Hardware Accents
Can I tell you a secret?
The hardware makes or breaks a vintage project.
Original vintage hardware adds authentic period character that reproduction pieces just can’t match. These small details handles, corner plates, decorative brackets take your project from good to incredible.
I hunt for vintage hardware at flea markets and estate sales every chance I get. It’s become a bit of an obsession, honestly.
What to look for:
- Brass pulls with genuine patina
- Copper corner guards showing age
- Iron handles with authentic wear
Important: Clean them gently. You want to preserve that aged finish, not polish them to brightness. That patina is valuable.
Installation strategy:
Think about both aesthetics and function. Where does a handle make sense? Where do you need structural support?
Leather handles are another vintage option that feels wonderful to touch. They age beautifully too.
Mix it up:
Don’t feel like everything needs to match. A brass handle paired with iron brackets creates that collected-over-time look that feels more authentic.
Safety check:
Before you install any vintage hardware, test it for structural soundness. Check for cracks or weakness. Beautiful hardware that fails under stress is dangerous.
These authentic details are what transform a new build into something that looks genuinely antique. They’re truly the finishing touch that makes all the difference.

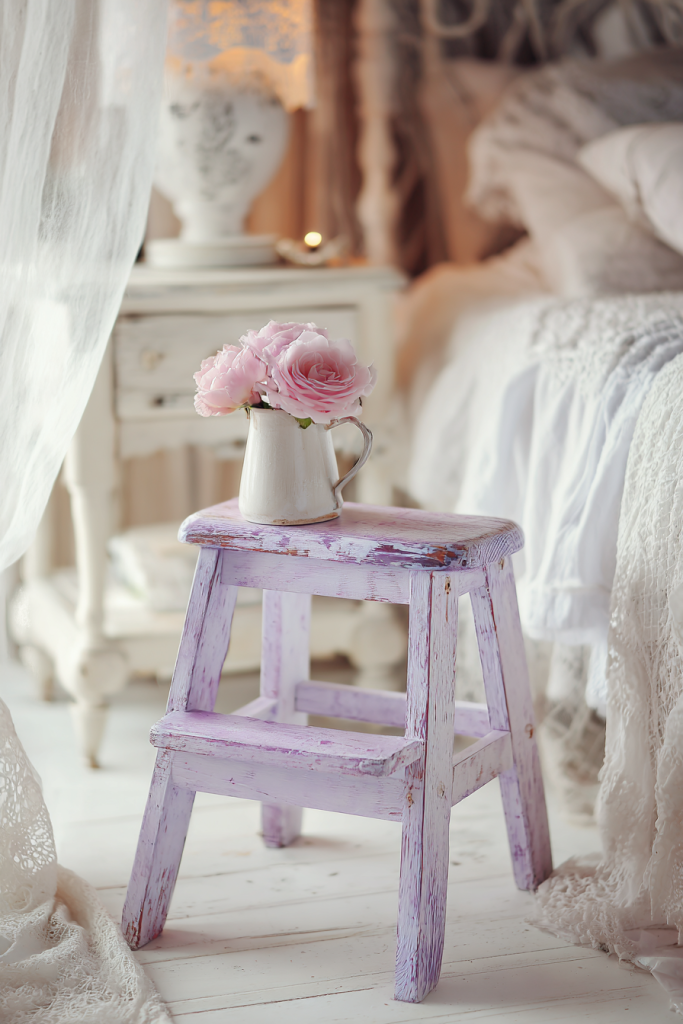
14. Color-Washed Technique
Color washing is like watercolor painting for furniture.
I love this technique because it creates such a soft, transparent finish. You get color while still showcasing the wood grain underneath. It’s romantic, artistic, and totally unique.
Perfect for cottage-style pieces? Absolutely.
The basic technique:
Thin your chosen paint color with water until it’s translucent. Test on scrap wood first every color behaves differently.
Apply with a brush in long, flowing strokes. Follow the grain. Work quickly to maintain a wet edge and avoid lap marks.
While the wash is still wet:
Use a clean cloth to blend and soften the color. You can remove color from lighter areas or add more layers for depth.
Color suggestions:
Soft pastels work beautifully:
- Lavender (dreamy)
- Pale yellow (sunny)
- Blush pink (romantic)
The finishing touch:
Seal with water-based polyurethane. This protects that delicate finish without yellowing it.
The whole approach creates this dreamy, vintage look that’s perfect for shabby chic or cottage interiors. It has a watercolor quality that feels artistic in a way that regular paint just doesn’t achieve.
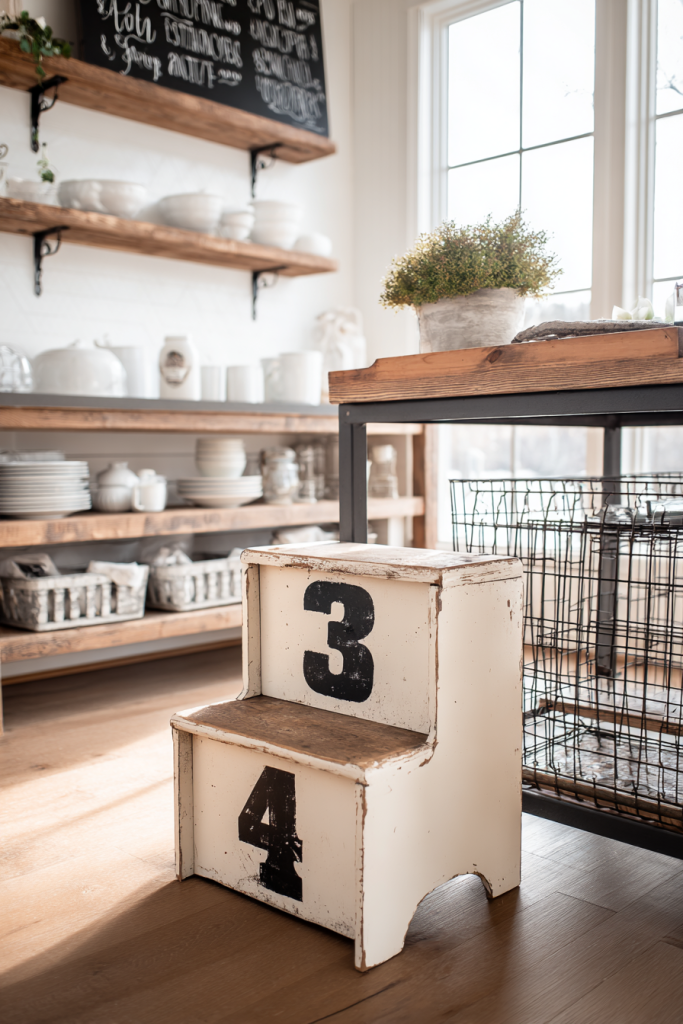
15. Numbered Vintage Typography
Last but definitely not least let’s talk typography.
Adding vintage numbers or lettering gives your step stool that collected, antique feel. I especially love this for farmhouse or industrial styles.
Typography adds personality. It makes pieces feel like they have a history or purpose, even when they’re brand new.
Design options:
Create your own stencils or buy vintage-style number sets. Both work great.
Paint numbers on the steps, side panels, or front risers. Get creative with placement.
Make it personal:
Consider using:
- Measurement markings
- Important dates
- House numbers
- Family initials
Black or dark gray numbers stand out beautifully against lighter backgrounds. That contrast is key.
For an aged appearance:
Paint your numbers, then lightly sand for a worn look. Simple but effective.
Want crisp typography? Use transfer paper or vinyl lettering instead.
Style variations:
Roman numerals add elegant sophistication. Standard numbers create farmhouse charm. Faux inventory markings or workshop labels give you that industrial appeal.
This detail transforms a simple stool into a genuine conversation piece. People always ask about the numbers when they see these pieces.
Why You Should Build Your Own Vintage Step Stool
Here’s what I’ve learned after building dozens of these.
Creating a vintage-inspired step stool is genuinely rewarding. These aren’t just functional pieces they add real character and charm to your space. And you use them every single day.
The beauty of these projects? Flexibility.
You can adapt any design to match your skill level. Limited woodworking experience? Start simple. Been doing this for years? Go elaborate.
Don’t have expensive materials? Use what you’ve got. Prefer a specific color palette? Adjust it. That’s the magic of DIY.
My advice:
Start with basic construction and simple finishes. Get comfortable with the process. Then add decorative elements as your confidence grows.
Don’t be afraid to combine techniques either. Mix distressed paint with vintage hardware. Try color washing with stenciled details. Some of my favorite pieces use multiple techniques together.
The most important thing:
Embrace imperfections.
Those slight irregularities? They add authenticity to vintage-inspired pieces. Stop striving for factory-perfect precision. Your handmade quality is what makes the piece special.
Those personal touches make your stool unique. They tell your creative story.
So gather your materials. Pick a design that speaks to you. And start building.
The process is enjoyable. The results are beautiful. And you’ll have a functional piece that serves you for years while adding timeless appeal to your home.
Trust me once you build one, you’ll want to make more.
Frequently Asked Questions
What’s the best wood type for building a vintage-inspired step stool?
Pine and poplar are my go-to recommendations for beginners.
Why? They’re affordable and easy to work with. These softwoods accept paint beautifully, and you can find them at any home improvement store.
Want something more durable that’ll last generations?
Go with hardwoods:
- Oak (classic choice)
- Maple (strong and beautiful)
- Cherry (rich color)
Reclaimed barn wood is another option. You get instant vintage character with natural weathering and patina already built in.
Match your wood to your finish:
Softwoods work best for painted finishes. Hardwoods shine when stained.
Whatever you choose, make sure it’s dry and free from major cracks or defects. Structural integrity matters more than looks when safety is involved.
How much does it typically cost to build a DIY vintage step stool?
Material costs vary quite a bit based on what you choose.
Basic pine step stool using new lumber:
Expect to spend competitive price rangefor materials. This includes:
- Wood
- Screws
- Glue
- Sandpaper
- Simple paint or stain
Using reclaimed wood?
Costs drop to almost nothing if you have access to salvaged materials. I’ve built gorgeous stools for affordably priced using reclaimed wood and leftover paint.
Going premium?
Hardwoods or elaborate hardware can push costs to competitive price range. Vintage hardware, specialty paints, or decorative stencils add to the budget.
The comparison:
Even high-end DIY versions cost significantly less than buying comparable quality pieces. Antique or handmade stools often sell for competitive price rangeor more.
Building your own saves serious money while giving you exactly what you want.
Do I need advanced woodworking skills to build these step stools?
Not at all.
Many vintage-inspired designs are perfect for beginners with basic tool familiarity.
Simple two-step designs require:
- Straight cuts
- Drilling holes
- Assembly
Most DIYers already possess these skills.
Tools you’ll need:
- A saw (hand saw, circular saw, or miter saw)
- Drill
- Sandpaper
- Basic measuring tools
More elaborate designs need intermediate skills:
Curved legs or folding mechanisms require additional tools like jigsaws or band saws. But you can work up to those.
My recommendation:
Start with straightforward projects to build confidence. Then tackle complex designs when you’re ready.
Numerous online tutorials and plans provide step-by-step guidance. The decorative finishing techniques distressing, stenciling, color washing require patience more than advanced skills.
Most crafters can handle these techniques with practice.
How can I ensure my step stool is safe and sturdy?
Safety starts with solid construction.
Use appropriate materials and techniques:
- Wood glue at all joints (in addition to screws)
- Pre-drill screw holes (prevents wood splitting)
- Ensure all four legs sit flat and even
Wobbling indicates structural issues. Fix them before using the stool.
Test weight capacity before regular use:
Have someone heavier than typical users stand on it. Better to discover problems during testing than during actual use.
Safety additions:
- Sand all surfaces smooth (no splinters!)
- Add non-slip material to step surfaces
- Include side handles for children or elderly users
- Apply durable finish coats for moisture and wear protection
Maintenance:
Regularly inspect your stool for loose joints or damage. Tighten screws as needed. Don’t ignore squeaks or wobbles they’re warning signs.
Weight capacity:
A well-constructed vintage-inspired stool should easily support 200-300 pounds safely. If you’re unsure, build stronger rather than weaker. Better to over-engineer than under-engineer when safety is involved.