
There’s nothing quite like the warm glow of candles to make a space feel cozy and inviting. I absolutely love using candles throughout my home to create ambiance, especially during those cooler months when you just want everything to feel extra snug. But here’s the thing—accidents happen. One moment you’re enjoying a peaceful evening, and the next, you’ve got a puddle of melted candle wax staining your beautiful carpet. Trust me, I’ve been there more times than I’d like to admit!
If you’re wondering about the best way to get candle wax out of carpet, I have good news: it’s totally fixable, and you probably already have everything you need right at home. Over the years, I’ve tested countless methods (some more successful than others), and I’m excited to share the techniques that actually work. Whether you’re dealing with a tiny drip or a full-on wax disaster, you’ll learn exactly how to tackle it without damaging your carpet fibers.
In this guide, I’ll walk you through multiple proven methods, share my favorite insider tricks, and help you understand why certain approaches work better than others. By the end, you’ll feel confident handling any waxy situation that comes your way—and your carpet will look like nothing ever happened.
| Difficulty Level | Easy to Moderate |
| Time Required | 15-30 minutes |
| Tools Needed | Iron, paper towels, ice, vacuum |
| Cost | Budget-friendly (household items) |
| Best For | Fresh or dried candle wax spills |
| Success Rate | Very high with proper technique |
Understanding Why Candle Wax Sticks to Carpet Fibers
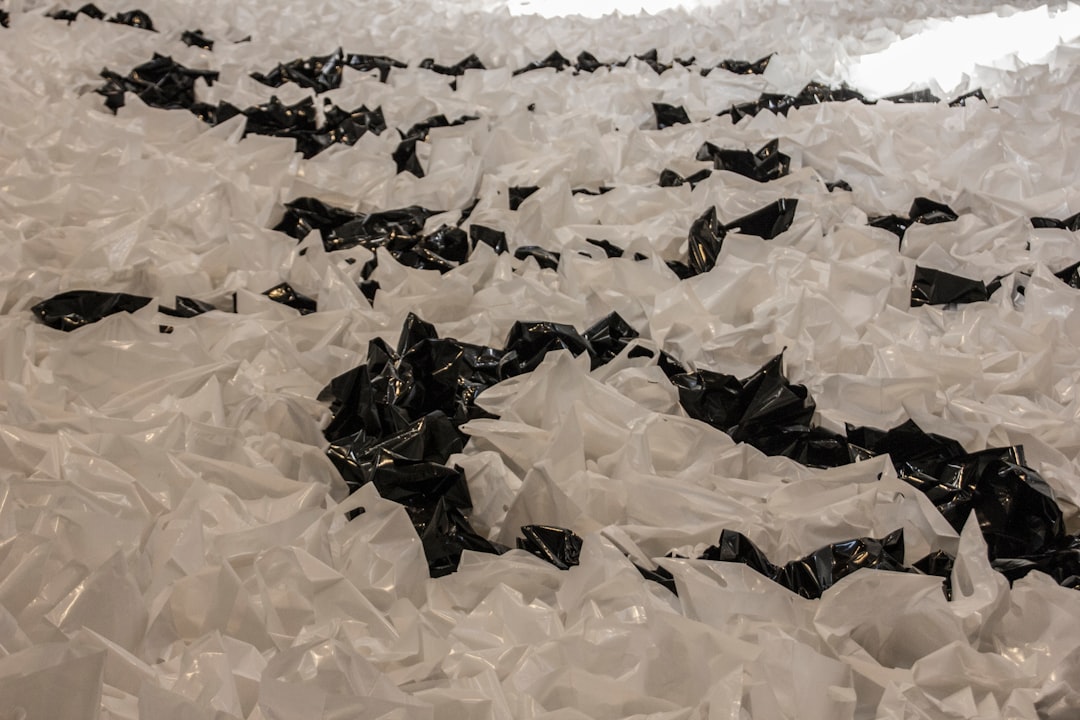
Before we dive into removal methods, it really helps to understand what you’re dealing with. Candle wax is essentially a solid at room temperature that becomes liquid when heated. When it spills onto your carpet, it seeps down between the fibers and then quickly solidifies again, creating a bond that can feel pretty stubborn to break.
The good news is that wax doesn’t actually stain carpet the way, say, red wine or coffee does. What you’re seeing is the wax coating the fibers rather than changing their color. This is why the best way to get candle wax out of carpet involves either re-melting it so you can absorb it away, or freezing it solid so you can break it apart. The key is working with the wax’s natural properties rather than against them.
Different types of candle wax (paraffin, soy, beeswax) behave slightly differently, but the removal methods I’m about to share work for all varieties. Soy wax tends to be a bit easier to remove since it has a lower melting point, while paraffin can be more stubborn. If your candle was colored or scented, you might notice a slight residue even after removing the bulk of the wax—don’t worry, I’ll show you how to handle that too.
One thing I always tell people: don’t panic and start scrubbing immediately. That’s actually the worst thing you can do because you’ll just work the wax deeper into the carpet pile. Patience is your friend here, and methodical action beats frantic scrubbing every single time.

The Iron and Paper Towel Method: My Go-To Technique
This is hands-down my favorite method for removing candle wax from carpet, and it’s the one I recommend to clients all the time. It’s simple, effective, and uses items you already have in your home. The principle is straightforward: you’re going to re-melt the wax and absorb it into paper towels before it can solidify again.
Here’s exactly how to do it. First, if the wax is still soft or wet, let it harden completely. I know it’s tempting to rush in, but trust me on this—working with hardened wax is much easier. You can speed this up by placing an ice pack over the spill for about 10 minutes. Once it’s solid, gently scrape off as much of the top layer as you can using a butter knife or credit card. Be careful not to cut or damage the carpet fibers.
Next, grab your iron and set it to medium heat—no steam! Place a brown paper bag or several layers of plain white paper towels over the remaining wax. Never use newspaper or printed paper bags because the ink can transfer to your carpet. Gently press the warm iron onto the paper and hold it there for about 10 seconds. You’ll see the wax start to melt and absorb into the paper. Lift the iron, move to a clean section of paper, and repeat until no more wax transfers.
The magic happens when you see that wax soaking into the paper towels—it’s honestly so satisfying! I usually go through 4-6 paper towels for a medium-sized spill. Once you’ve absorbed all the wax you can, vacuum the area thoroughly to lift any remaining residue and restore the carpet’s texture. If there’s a slight oily mark left behind (common with scented candles), I’ll tackle that in the cleaning section below.
The Freezing Method: Perfect for Large Spills
When you’re dealing with a bigger wax spill—like when an entire candle tips over—the freezing method can be a lifesaver. This approach works particularly well on carpets with shorter pile where you can really get in there to break up the wax. I’ve used this method countless times, and it’s especially great if you don’t have an iron handy or feel nervous about applying heat to your carpet.
Start by filling a plastic bag with ice cubes and placing it directly on top of the wax spill. You want the wax to get absolutely rock-hard, which usually takes about 15-20 minutes. Here’s a pro tip: add a bit of salt to your ice to make it even colder, which speeds up the freezing process. While you’re waiting, resist the urge to poke at it—just let the cold do its work.
Once the wax is frozen solid and brittle, it’s time for the fun part. Use a butter knife, spoon, or even an old credit card to gently chip away at the wax. It should break apart into small pieces that you can pick up or vacuum away. Work from the outside edges toward the center to avoid spreading the mess. You might hear little cracking sounds as the wax shatters—that’s exactly what you want!
For any stubborn bits that won’t budge, you can combine this with the iron method. Freeze it first to remove the bulk, then use the heat-and-absorb technique for whatever remains. This one-two punch approach is incredibly effective for those really challenging spills. I’ve tackled wax spills the size of dinner plates using this combo method, and the carpet looked perfect afterward.
Cleaning Colored Wax and Removing Residual Stains
Okay, so you’ve removed the bulk of the wax—congratulations! But what if you’re left with a colored stain or an oily residue? This is super common with colored candles or heavily scented varieties that contain additional oils. The wax itself might be gone, but you could still have a mark that needs addressing. Don’t worry, this is totally fixable.
For colored wax stains, I always reach for isopropyl rubbing alcohol (the 90% concentration works best). Dampen a clean white cloth with the alcohol—never use colored cloths because the dye can transfer—and gently blot the stained area. You’re not scrubbing; you’re blotting from the outside of the stain toward the center. Keep turning to a clean section of the cloth as you work, and you’ll see the color lifting out.
If you don’t have rubbing alcohol, a mixture of dish soap and warm water can work wonders on oily residue. Mix about one tablespoon of clear dish soap with two cups of warm water. Dip a clean cloth in this solution, wring it out well (you want it damp, not soaking), and blot the area. The surfactants in dish soap are excellent at breaking down those waxy oils that sometimes get left behind.
After treating with either method, it’s crucial to rinse the area with clean water. Take another cloth dampened with plain water and blot the area to remove any cleaning solution residue. Then place several layers of paper towels over the damp spot and weigh them down with something heavy like a book. This wicks away moisture and prevents any remaining residue from creating a dirt-attracting spot. Let it sit for a few hours or overnight, then vacuum to restore the carpet’s natural texture.
Special Considerations for Different Carpet Types
Not all carpets are created equal, and the best way to get candle wax out of carpet can vary slightly depending on what type of flooring you’re working with. I’ve learned this through experience—sometimes the hard way! Understanding your carpet type will help you choose the safest, most effective removal method.
For synthetic carpets made from nylon, polyester, or olefin, you’re in luck—these are the most forgiving. You can safely use both the freezing and iron methods without much worry. Just keep your iron temperature moderate and always use a barrier (paper bag or towels) between the iron and carpet. These fibers are pretty heat-resistant, but you still don’t want to go overboard.
Natural fiber carpets like wool, sisal, or jute require a gentler touch. Wool especially can be sensitive to heat and moisture, so I typically lean toward the freezing method for these. If you do use an iron on wool, keep it on the lowest heat setting that still melts the wax, and work quickly. According to HGTV’s carpet care experts, natural fibers can also benefit from professional cleaning if you’re dealing with a large or particularly stubborn stain.
Shag or high-pile carpets present their own challenges because wax can seep down deep into those long fibers. For these, I recommend the freezing method first to harden and remove surface wax, followed by very careful application of the iron method. You might need to work in smaller sections and use more paper towels since there’s more surface area to cover. Patience is extra important here—rushing will just push wax deeper into the pile.
Antique or delicate rugs deserve special mention. If you’ve spilled wax on a valuable Persian rug or antique carpet, honestly, my best advice is to call a professional cleaner who specializes in fine textiles. The peace of mind is worth it, and you won’t risk damaging something irreplaceable. For everyday area rugs, though, the methods I’ve described work beautifully.
| Carpet Type | Best Method | Heat Setting | Special Notes |
|---|---|---|---|
| Synthetic (Nylon, Polyester) | Iron or Freezing | Medium | Most forgiving, both methods work well |
| Wool | Freezing preferred | Low (if using iron) | Sensitive to heat and moisture |
| Shag/High-Pile | Freeze then Iron | Medium | Work in small sections, extra patience needed |
| Berber | Freezing | Low-Medium | Loop construction requires gentle approach |
| Sisal/Natural Fiber | Freezing | Very Low | Test in hidden area first |
| Antique/Oriental Rugs | Professional Cleaning | N/A | Not worth the risk for valuable pieces |
Pro Tips for Perfect Wax Removal
After years of dealing with candle wax spills in my own home and helping clients with theirs, I’ve picked up some insider tricks that make the whole process smoother and more effective. These are the little details that separate okay results from absolutely pristine carpets.
First, always test any cleaning method in an inconspicuous area first—behind furniture or in a closet works great. This is especially important if you’re dealing with colored wax or using any cleaning solutions. I learned this lesson early in my design career when I didn’t test first and ended up with a slightly lighter spot on a client’s carpet. A two-minute test can save you from a much bigger headache.
Here’s something most people don’t know: the direction you work matters. When using the iron method, always move from the outside of the wax spill toward the center. This prevents spreading the melted wax over a larger area. Similarly, when blotting up stains, work from outside in and always use a fresh section of your cloth or paper towel with each blot. It sounds fussy, but it genuinely makes a difference in your final results.
Temperature control is absolutely crucial with the iron method. I keep my iron moving in small circular motions rather than pressing down hard in one spot. This distributes the heat evenly and prevents any risk of scorching the carpet fibers. If you’re not seeing wax transfer to the paper towels after 15-20 seconds, your iron might not be hot enough—bump it up one setting and try again.
For prevention (because an ounce of prevention really is worth a pound of cure), I always recommend using candle holders with lips or rims that can catch drips. Place candles on stable, level surfaces away from foot traffic, and never leave them unburned near curtains or in high-traffic areas. Similar to how you’d maintain other home accents like outdoor patio cushions that need regular care, a little prevention goes a long way with candles.
If you’re dealing with multiple wax colors that melted together, tackle the lightest color first. This prevents darker wax from staining lighter areas as you work. I once had a red and white candle spill create a pink mess when I didn’t follow this rule—lesson learned!
Keep your vacuum cleaner handy throughout the process. After each major step—whether you’re freezing and chipping or ironing and absorbing—give the area a quick vacuum. This removes loose wax particles before they can get worked back into the carpet. Plus, it helps you see exactly what you’re dealing with and whether you need to repeat any steps.
Finally, don’t be afraid to repeat the process. Sometimes one round isn’t enough, especially with thick wax spills or deeply colored candles. I’ve had situations where I needed to go through the iron-and-absorb process three or four times before getting all the wax out. It’s not a reflection of your technique—some spills are just more stubborn than others. Persistence pays off beautifully here.
Frequently Asked Questions
Can I use a hair dryer instead of an iron to melt candle wax?
Yes, you absolutely can use a hair dryer, though it takes a bit longer than an iron. Set it on the highest heat setting and hold it about 2-3 inches above the wax while holding paper towels in place with your other hand. The advantage is that it’s harder to accidentally scorch your carpet with a hair dryer, but the disadvantage is that it requires more time and patience. I find this method works best for smaller spills or when you’re nervous about using an iron on delicate carpet fibers.
What should I do if the wax has been there for weeks or months?
Old, set-in wax is actually easier to remove in some ways because it’s completely hardened and won’t smear. Start with the freezing method to make it extra brittle, then chip away as much as you can. You might find that aged wax breaks apart more readily than fresh spills. Follow up with the iron method for any remaining residue. The techniques work just as well on old wax as fresh—I’ve successfully removed wax that had been there for over a year using these same methods.
Will these methods work on area rugs and Oriental carpets?
For washable area rugs, yes—these methods work beautifully, and you have the added option of taking smaller rugs outside to work on them, which I actually prefer when possible. However, for valuable Oriental rugs, Persian carpets, or antique textiles, I strongly recommend professional cleaning. These pieces are investments, and the dyes used in handmade rugs can sometimes be affected by heat or moisture in ways that mass-produced carpets aren’t. According to the carpet maintenance guidelines for fine textiles, professional care is always the safest choice for irreplaceable pieces.
Can candle wax permanently stain carpet?
The wax itself won’t permanently stain your carpet because it’s sitting on top of the fibers rather than penetrating them. However, colored dyes in the wax can potentially leave a stain if not treated properly. This is why the best way to get candle wax out of carpet involves removing the wax first, then treating any color residue separately with rubbing alcohol or carpet cleaner. I’ve never encountered a wax stain that couldn’t be removed with persistence and the right technique, even deeply colored candles like red or purple.
Is it safe to use commercial carpet cleaners on wax residue?
Yes, commercial carpet cleaners can be helpful for treating oily residue or colored stains left after you’ve removed the bulk of the wax. Look for products specifically designed for grease or oil stains, as these work best on waxy residue. Always spot-test in a hidden area first, and follow the manufacturer’s directions carefully. I prefer using household items like rubbing alcohol and dish soap first because they’re gentler and usually just as effective, but commercial products definitely have their place for stubborn stains.
How do I prevent the carpet from looking matted after wax removal?
Great question! The key is proper vacuuming after the wax is completely removed and the area is dry. Use a vacuum with good suction and go over the area multiple times in different directions to lift the carpet pile back to its original texture. For particularly stubborn matting, you can gently brush the fibers with a soft-bristled brush (an old toothbrush works perfectly) to separate them, then vacuum again. If the area still looks slightly different, don’t worry—normal foot traffic will help blend it back in over a few days.
Moving Forward with Confidence
Now you’re armed with everything you need to tackle any candle wax spill like a total pro! I hope this guide has taken away some of the stress and shown you that wax removal really doesn’t have to be complicated or scary. Whether you choose the iron method, the freezing approach, or a combination of both, the key is staying patient and methodical. Your carpet will thank you.
Remember, candles add so much warmth and beauty to our homes—they’re one of my absolute favorite home accents for creating atmosphere and coziness. Don’t let the fear of potential spills keep you from enjoying them! With these techniques in your back pocket, you can light those candles with confidence knowing that any little accidents are completely fixable. Here’s to cozy, candle-lit spaces and pristine carpets that make your home feel absolutely perfect. You’ve got this!