
There’s something deeply personal about flipping through a physical photo album that scrolling through your phone just can’t replicate. I’ve lost count of how many clients tell me they have thousands of photos sitting on their devices, waiting to become something meaningful. Here’s the thing: your memories deserve better than digital storage, and creating a photo album isn’t just about preserving the past—it’s about crafting a beautiful home accent that tells your unique story.
The best way to create a photo album involves much more than simply sticking photos on pages. It’s about curating moments, choosing the right format for your lifestyle, and designing something that feels as good in your hands as it looks on your coffee table. Whether you’re documenting a wedding, preserving family history, or celebrating everyday moments, I’m going to walk you through everything you need to know to create an album you’ll treasure for decades.
Trust me, once you’ve created that first album and watched guests naturally gravitate toward it during gatherings, you’ll understand why photo albums remain one of the most meaningful home accents you can display. Let’s dive into the best approaches for bringing your photos to life.
| Quick Info | Details |
|---|---|
| Time Required | 3-8 hours for a standard album |
| Difficulty Level | Beginner to Intermediate |
| Best For | Coffee tables, shelves, memory boxes |
| Materials Needed | Photos, album, adhesive, embellishments |
| Design Styles | Traditional, modern, scrapbook, minimalist |
| Longevity | 50+ years with archival materials |
Choosing the Right Album Format for Your Needs
Before you touch a single photo, you need to decide which album format works best for your project. I always tell my clients that this decision shapes everything else, so it’s worth taking time to consider your options carefully. Traditional bound albums with adhesive pages offer a classic look and feel—perfect for weddings or milestone events. These albums typically feature black or ivory pages where you arrange photos with corner mounts or photo-safe adhesive.
Slip-in albums with clear protective sleeves are wonderfully practical for families who want to display lots of photos without fussing over layout. You’ll find these in various sizes, from small 4×6 albums to larger formats that accommodate 5×7 or 8×10 prints. What I love about slip-in albums is how quickly you can swap photos if you change your mind, making them ideal for rotating seasonal displays on your console table or bookshelf.
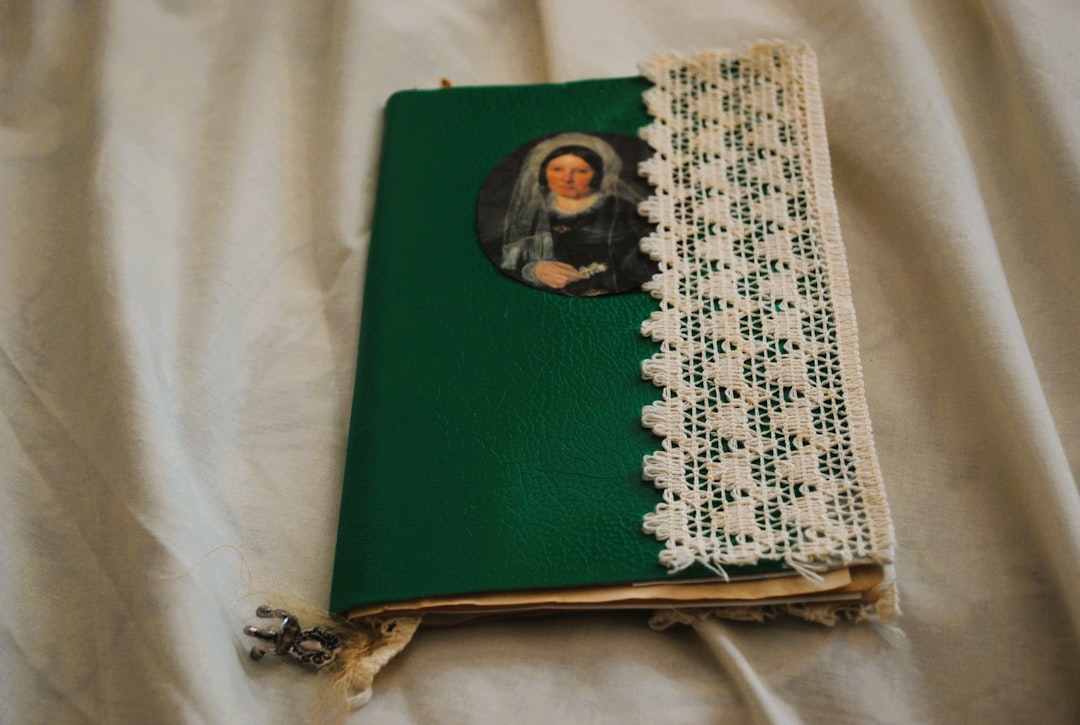
Scrapbook-style albums give you maximum creative freedom with thicker pages that support embellishments, handwritten notes, and mixed media. These are my go-to recommendation when you want your album to function as both a photo collection and a storytelling piece. The pages can handle ticket stubs, pressed flowers, fabric swatches—anything that adds dimension to your memories. According to preservation experts at the Library of Congress, choosing acid-free, lignin-free materials ensures your photos won’t yellow or deteriorate over time.
Digital photo books created through online services bridge the gap between traditional albums and modern convenience. These professionally bound books feature your photos printed directly onto pages, often with customizable layouts and text. They’re sleek, durable, and incredibly giftable—I’ve designed dozens for clients who want a polished, coffee-table-worthy result without the hands-on assembly process.
Curating and Organizing Your Photos
Here’s what most people get wrong: they try to include every single photo from an event or period. The best way to create a photo album that people actually want to look through is to be selective. I recommend starting with 2-3 times more photos than your album will hold, then narrowing down to the best shots. Look for photos that tell a story, capture genuine emotion, or showcase important details you don’t want to forget.
Create a simple organizational system before you begin. I use the “pile method” with clients—separate physical prints or digital files into categories like “must include,” “maybe,” and “alternatives.” For a wedding album, you might have piles for getting ready, ceremony, portraits, and reception. For a vacation album, organize by location or day. This pre-sorting saves enormous amounts of time and prevents the overwhelm of staring at hundreds of unorganized images.
Think about your album’s narrative flow. You’re not just arranging photos chronologically—you’re creating a visual story with pacing and rhythm. I love opening with an establishing shot that sets the scene, then mixing wider shots with intimate close-ups throughout. Include detail photos of things like your grandmother’s hands, your child’s favorite toy, or the architecture of a building you visited. These texture shots add depth and prevent monotony.
Consider print quality and sizing strategically. For physical albums, order prints in multiple sizes to create visual interest on each page. A classic layout might feature one 5×7 photo flanked by two 4×6 images, or a single 8×10 statement photo on its own page. Digital photo book platforms typically offer layout templates, but you can customize these to prevent your album from looking generic or template-driven.
Design Principles for Beautiful Photo Albums
The difference between a thrown-together album and a stunning one often comes down to thoughtful design choices. White space is your friend—resist the urge to fill every inch of every page. In my own albums, I typically limit pages to 2-4 photos maximum, allowing each image room to breathe. This approach creates a sophisticated, gallery-like feel that elevates your photos from snapshots to displayed art.
Color coordination matters more than you might think. When arranging photos on a page or spread, consider how colors interact. I like grouping photos with similar color palettes together, or intentionally creating contrast with complementary colors. If you’re working with a scrapbook-style album, choose background papers and embellishments that enhance rather than compete with your photos. Neutrals like cream, soft gray, and kraft paper work beautifully with nearly any photo palette.
Typography and journaling add personality and context that pure images can’t provide. Even simple captions noting dates, locations, or names make albums infinitely more valuable to future generations. Choose fonts that match your album’s style—elegant scripts for weddings, clean sans-serifs for modern albums, playful handwriting fonts for children’s albums. Keep text brief and meaningful rather than describing what’s obvious in the photo.
Balance and symmetry create visual harmony, but don’t be afraid to break the rules intentionally. I love an asymmetrical layout where photos of different sizes create dynamic tension on the page. Try placing a large horizontal photo at the top with two smaller vertical photos below, or use the rule of thirds to position focal points at natural eye-catching spots. Museum galleries offer endless inspiration for sophisticated photo arrangement techniques.
Preservation and Assembly Techniques
If you’re investing time in creating a photo album, you want it to last generations. Archival quality materials are non-negotiable in my book. Look for albums and supplies labeled acid-free, lignin-free, and PVC-free. Regular paper and adhesives contain chemicals that will actually damage your photos over time, causing yellowing, brittleness, and fading. Quality photo albums designed for preservation typically feature this information prominently on their packaging.
Choose the right adhesive for your album type. Photo corners are classic and reversible—you can remove photos without damage if needed. Double-sided photo tape designed for scrapbooking offers clean, invisible mounting. Photo mounting squares provide dimension and are ideal for layering techniques. Whatever you choose, test it on a duplicate photo first to ensure it doesn’t bleed through or create visible marks.
Handle your photos with clean, dry hands or cotton gloves to prevent oil transfer and fingerprints. I keep a soft, lint-free cloth nearby when working on albums to quickly address any smudges. Store photos and albums in cool, dry environments away from direct sunlight, which is perhaps the biggest enemy of photo longevity. Humidity causes mold and mildew, while excessive heat can cause photos to stick together or warp.
For scrapbook albums with embellishments, use a bone folder or similar tool to burnish adhesive firmly in place without damaging materials. Work in a clean, uncluttered space where you can lay out entire spreads before committing to placement. I cannot stress this enough: arrange everything first, take a photo with your phone for reference, then adhere one page at a time. This preview step has saved countless albums from layout regret.
| Album Type | Best Use | Pros | Cons |
|---|---|---|---|
| Traditional Bound | Weddings, milestones | Classic look, archival quality, fully customizable | Time-intensive, requires assembly skills |
| Slip-In | Everyday photos, casual display | Quick assembly, photos protected, affordable | Limited creativity, standard layouts only |
| Scrapbook Style | Storytelling, mixed media | Maximum creativity, includes memorabilia, unique | Very time-consuming, requires materials |
| Digital Photo Book | Professional gifts, coffee table display | Polished finish, no assembly, durable binding | No hands-on crafting, limited to platform templates |
| Mini Albums | Gifts, specific events, travel | Portable, focused stories, great for gifting | Limited photo capacity, smaller viewing size |
Styling Photo Albums as Home Decor
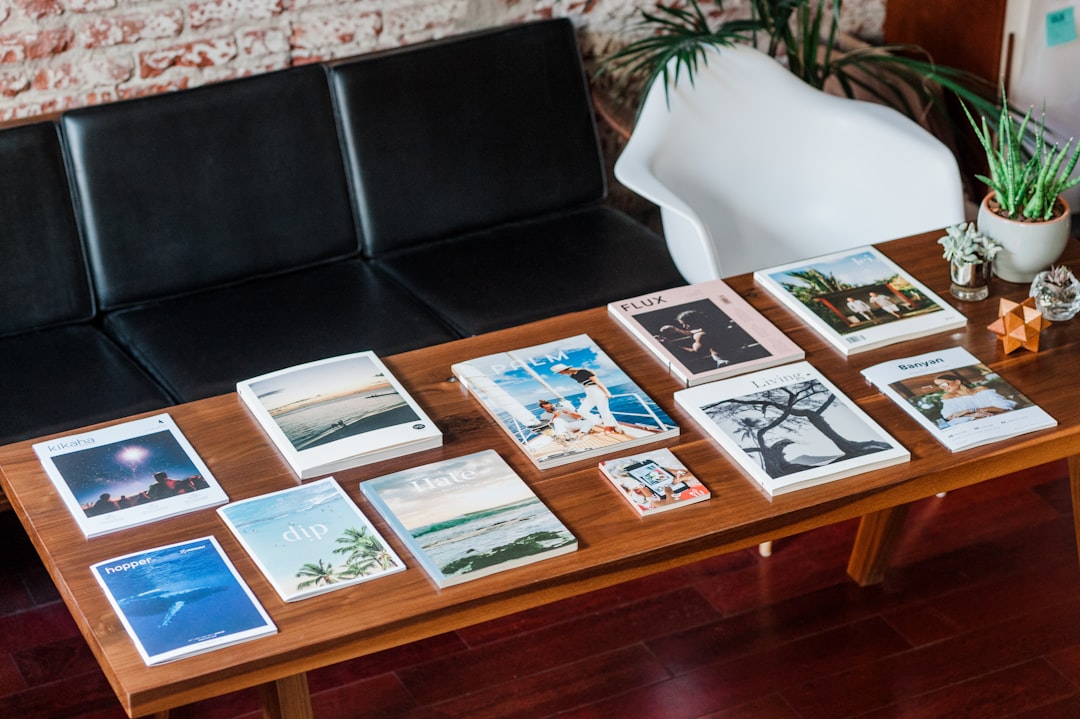
Once you’ve created your beautiful photo album, don’t hide it away—these are meant to be living, breathing parts of your home’s decor. Coffee tables are the natural habitat for stunning photo albums. I style them alongside a small decorative object like a sculptural bowl or vintage magnifying glass, and perhaps a couple of art books to create a curated vignette. Stack 2-3 albums of varying sizes for added visual interest.
Open albums displayed on stands or easels become instant conversation starters. This works particularly well on console tables in entryways, on bedroom dressers, or on shelving in your living room. Choose a favorite spread and let it be the focal point of a small vignette. I rotate which spread I display every few months to keep things fresh and give different memories their moment in the spotlight.
Bookshelves deserve albums too, but don’t just slot them in like regular books. Turn albums face-out to show off their covers, or create a dedicated album section with a small framed photo or decorative bookend. Mix albums with other meaningful objects—a vase of flowers, a small plant, or a piece of pottery that complements the album’s color palette.
For larger collections, invest in a beautiful album storage box or basket that keeps albums protected while looking intentional. Woven baskets in natural materials work beautifully in family rooms, while leather or linen storage boxes feel more formal for office or library settings. The key is making albums accessible—if they’re buried in a closet, no one will ever enjoy them.
Pro Tips for Creating Standout Photo Albums
After helping dozens of clients create albums over the years, I’ve learned some insider tricks that separate good albums from truly exceptional ones. First, always create albums in batches when possible. If you’re documenting a year of family life, create four seasonal mini-albums rather than one overwhelming book. This approach feels more manageable, gets completed faster, and gives you more frequent opportunities to display different albums.
Include photos of ordinary moments alongside the big events. Trust me, in twenty years, you’ll treasure the snapshot of your messy kitchen on a Tuesday morning just as much as the perfectly posed holiday photo. These everyday images provide context and authenticity that make albums feel like true time capsules rather than highlight reels. I always include at least 30% “everyday life” photos in family albums.
Create intentional blank spaces for future additions. In albums documenting ongoing stories—like a baby’s first year or a multi-generational family album—leave empty pages or spots where future photos can be added. This forward-thinking approach keeps albums from feeling frozen in time and allows them to grow with your family’s story. Mark these spaces with light pencil notes about what might go there.
Duplicate your favorite albums digitally even if you created physical versions. Scan completed pages or photograph each spread with good lighting to create a digital backup. Store these files in multiple locations—cloud storage, external hard drive, and perhaps with a trusted family member. This redundancy ensures your work and memories survive even if something happens to the physical album.
Involve your family or the album’s subjects in the creation process when appropriate. Children love helping select photos and adding their own drawings or notes to pages. Spouses can contribute journaling from their perspective. Multiple viewpoints and handwriting styles add richness and authenticity that solo-created albums can’t match. Plus, the creation process itself becomes a memory worth cherishing.
Think about album covers as seriously as interior pages. A beautiful, personalized cover sets expectations and makes albums more likely to be picked up and enjoyed. Consider custom embossing, photo covers, fabric wraps, or even DIY book cloth covers in colors that complement your decor. The cover is your album’s first impression—make it count.
Set realistic timelines and celebrate small victories. Creating a comprehensive album in one weekend sounds appealing but often leads to burnout and abandoned projects. Instead, commit to completing 5-10 pages per session, or dedicate one hour weekly to album work. Breaking the project into manageable chunks maintains your enthusiasm and produces better results than rushed marathon sessions.
Frequently Asked Questions
What is the best way to create a photo album for beginners?
For beginners, I always recommend starting with a slip-in album or a simple traditional album with pre-designed layouts. Choose one specific event or time period to document rather than trying to tackle years of photos at once. Order your prints in standard sizes (mostly 4×6), organize them chronologically or by theme, and simply place them in the album with minimal embellishment. Focus on completing your first album rather than making it perfect—you’ll learn valuable lessons about photo selection and pacing that will improve your next project. Many beginners find success with hybrid approaches, using digital photo book services that offer drag-and-drop templates, which eliminate the intimidation factor while still producing beautiful results.
How many photos should I include in a photo album?
Quality always trumps quantity when it comes to photo albums. For a standard 20-30 page album, I typically recommend 40-80 photos, which allows 2-4 photos per page with adequate white space. Wedding albums often contain 80-120 photos across 30-40 pages, while vacation albums might feature 50-70 images. The key is ensuring every photo serves a purpose—whether it advances the story, captures an important detail, or simply makes you smile. If you’re debating whether to include a photo, ask yourself if it adds something new or just repeats what other photos already show. Remember, people are more likely to look through a curated 50-photo album multiple times than a overwhelming 300-photo collection once.
What materials do I need to create a photo album at home?
The essential materials depend on your album style, but basic supplies include your chosen album (bound, scrapbook, or slip-in), printed photos in your desired sizes, and appropriate adhesive (photo corners, double-sided photo tape, or mounting squares). For scrapbook-style albums, add cardstock or patterned paper for backgrounds, journaling pens with archival ink, and perhaps a few embellishments like stickers, washi tape, or die-cuts. I always keep a ruler, paper trimmer, and scissors on hand for precise work. Invest in archival-quality, acid-free materials if you want your album to last—these cost slightly more but make an enormous difference in longevity. A bone folder for smooth adhesion and a pencil for light placement marks round out the toolkit. You don’t need expensive specialized equipment; most materials are available at craft stores or online.
How do I protect photos in an album from fading or damage?
Protection starts with material selection—use only acid-free, lignin-free, PVC-free albums and supplies, which won’t emit chemicals that degrade photos over time. Store albums in cool, dry locations away from direct sunlight, heat sources, and humidity. Basements and attics are generally poor storage locations due to temperature fluctuations and moisture. For slip-in albums, the protective sleeves shield photos from fingerprints and environmental damage. In traditional albums, consider using photo corners instead of permanent adhesive so photos can be removed if needed for restoration or reprinting. Handle photos with clean, dry hands or cotton gloves, and avoid using regular tape, rubber cement, or magnetic albums (yes, those old-school magnetic albums are actually terrible for photos). If you live in a particularly humid climate, silica gel packets in storage boxes can help absorb excess moisture.
Should I create digital photo books or traditional physical albums?
Both options have distinct advantages, and the best choice depends on your priorities and how you’ll use the album. Digital photo books excel at creating polished, professional-looking results quickly, making them ideal for gifts, coffee table display, or when you want multiple copies (grandparents love receiving their own copies). They’re also more durable for frequent handling since pages are printed and bound professionally. Traditional physical albums offer unmatched creative freedom, the tactile pleasure of handcrafted pages, and the ability to include actual memorabilia like ticket stubs or pressed flowers. I often recommend a hybrid approach: create a traditional album for your personal collection where you can include mixed media and handwritten notes, then design a simplified digital photo book version for gifting to family members. This gives you the best of both worlds without duplicating all your effort.
Conclusion
Creating a photo album is more than a craft project—it’s an act of love that preserves your most meaningful moments in a form you can actually enjoy, not just store. The best way to create a photo album isn’t about following rigid rules or achieving Pinterest-perfect results. It’s about capturing your unique story in a format that invites connection, conversation, and reflection. Whether you choose a simple slip-in album, an elaborate scrapbook, or a sleek digital photo book, you’re creating a home accent that brings warmth and personality to your living spaces while safeguarding irreplaceable memories.
I encourage you to start today, even if it’s just ordering prints for a single special weekend or gathering your supplies for a larger project. Your memories are too precious to remain trapped in digital devices, and your home deserves the personal touch that only curated, displayed photo albums can provide. Trust the process, embrace imperfection, and remember that the act of creating these albums—choosing photos, remembering stories, crafting pages—is a gift to your future self and generations to come. Now go create something beautiful.